Hello Learners, In this article we learn about Dinstar GSM Gateway configuration with Freepbx for making outgoing and incoming calls.
Table of Contents
About it:
The DINSTAR GSM/CDMA gateway having the ability to originate or terminate calls from or to local GSM networks. It is a very cost-effective way for SOHO, SMEs to generate and receive calls through the GSM gateway.
In this article, we are using the DWG2000G Business model of Dinstar for example. While you can try this setup on different models. They are having nearly similar functionality on other models also.
So as you know we are simple people and we like simple things. That’s why we divide the process into simple steps.
Step 1: Initialize the Dinstar GSM Gateway
The very first step of every technical process is initializing. Let’s power on the GSM Gateway and connect it with your network or PC using a network cable.
Now remember the Dinstar Gateways are by default coming with this static IP: 192.168.11.1
Make sure if you connect it with your network, the IP is not conflicting with any other devices.
Now assign a static IP of the same network as GSM gateway to your PC. For example, assign 192.168.11.2 with the subnet mask 255.255.255.0 and default gateway 192.168.11.1. Now you can connect to GSM gateway using your browser.
Now open your preferred browser and type 192.168.11.1 in the address bar and hit enter. You can see the following screen for authentication.
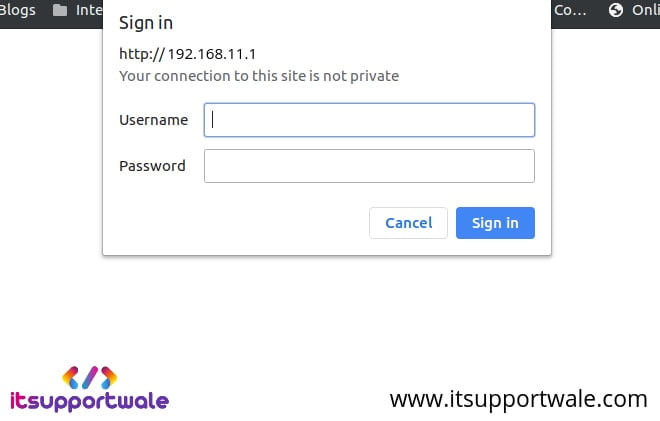
Dinstar Gateway comes with the default username and password of admin/admin. Type the username and password and click on sign in. After sign in you can see the following dashboard

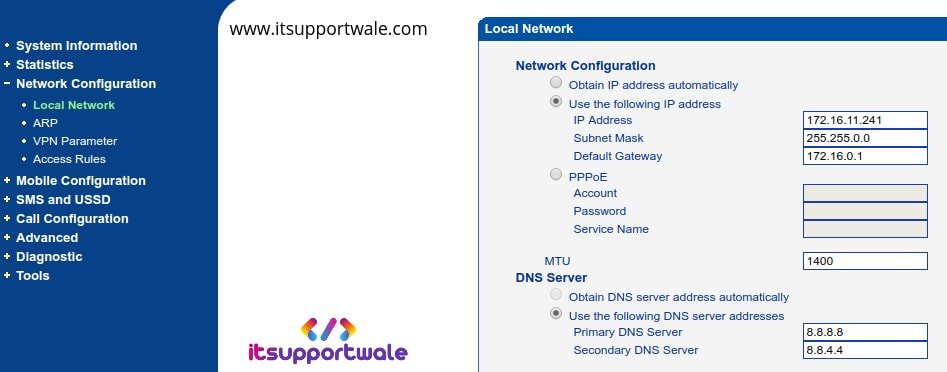
After sign in go to the network tab from the left sidebar and set the IP of the Dinstar gateway. For example, here I am using 172.16.11.241 as my GSM Gateway IP. See the below screenshot of my network configuration.
After carefully assign all required values and save the settings.
Step 2: FreePBX Configuration for GSM Gateway
In this step, we set up things in our Freepbx Server. For this tutorial, we use 172.16.11.240 as the IP address of our FreePBX server.
- Also, Read more Info about FreePBX.
Step 2.1: Create SIP Trunk in FreePBX
Note: We are going to use a single username and password for the authentication of all our extensions. So that we have to create a trunk in our FreePBX server.
To create SIP trunk, go to Connectivity ——————–> Trunks and then click on Add Trunk ———————-> Add SIP (chan_sip) Trunk. Now I am adding a screenshot for every step.
Now in general tab enter a name for our trunk in Trunk Name.

After that, go to SIP settings and enter details of our Dinstar gateway in an outgoing tab like the below image. We don’t need to setup manipulation rules at this time.

Now in the Incoming tab enter the details with username and secret(password) which we are going to use for authentication. see the example below :

After that, click on Submit and Apply changes.
Step 2.2: Create SIP Extension in FreePBX
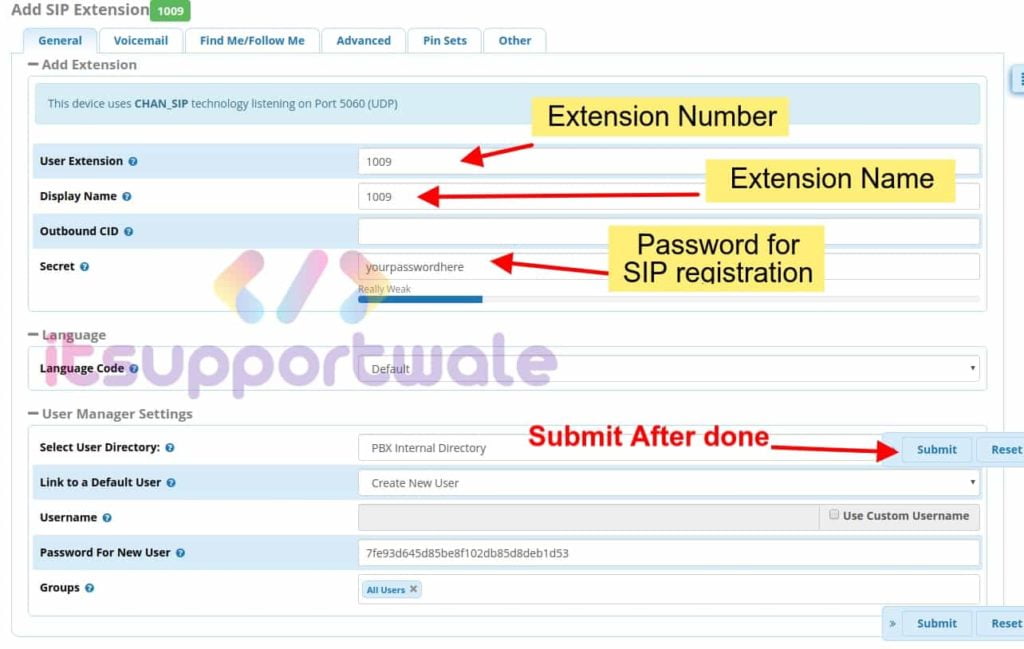
In this step, we create extensions to make outgoing calls and receive incoming calls. For this go to Applications ————-> Extensions and then click on Add Extension ——-> Add New Chan_SIP Extension.

After that, enter all the three required details for SIP extension. You can see the example in the below screenshot.
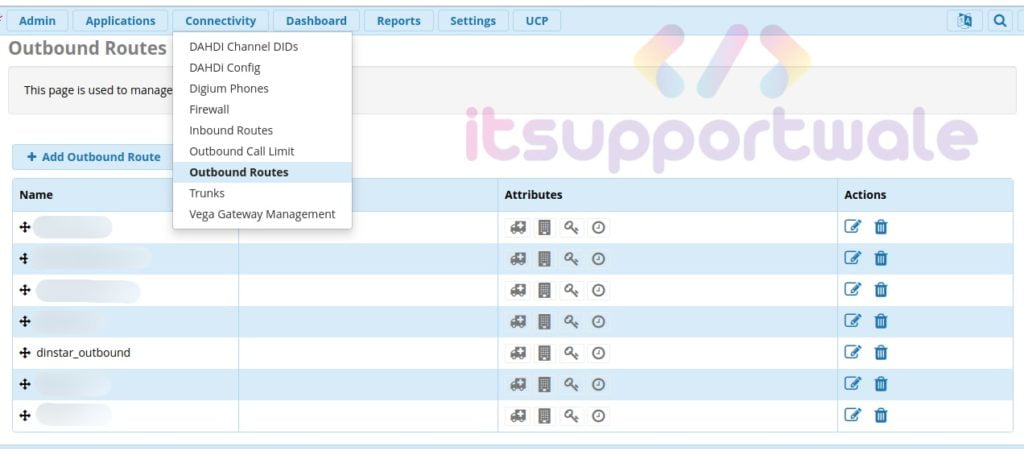
Step 2.3: Create Outbound Routes in FreePBX
For making outgoing calls, We have to create Outbound Routes for our SIP extensions in FreePBX.
For creating new Outbound Route Goto Connectivity ——–> Outbound Routes And Click on Add Outbound Route. See the example in the below image.
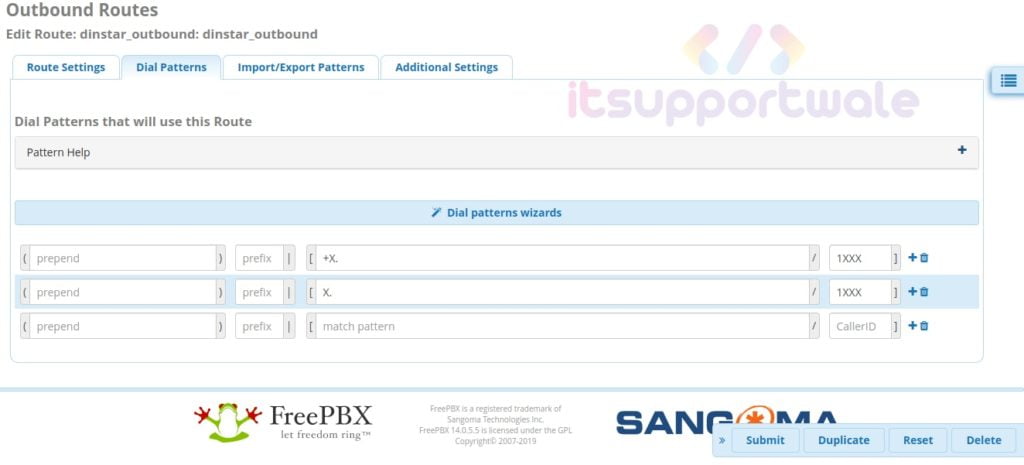
After that, Add the required information in the Route Setting tab and select our Dinstar trunk which we created in the previous step. Like the below screenshot.

In the Dial Patterns, you can define which numbers should use the route. For example, in below image we configure all 4 digit numbers which starting with 1 will be using this route for outgoing calls.
Here we completed the configuration needed for FreePBX. Next, we have to configure Dinstar GSM Gateway.
Step 3: Setup SIP Configuration in GSM Gateway
In the second step, we configure FreePBX details in our SIP configuration. So that it can communicate with our FreePBX server. See the below steps to reach the correct settings page.
Go to Call Configuration ———> SIP Configuration
After that fill the SIP Server Address, In this tutorial we use 172.16.11.240 as our FreePBX server IP. See the below screenshot for better understanding.
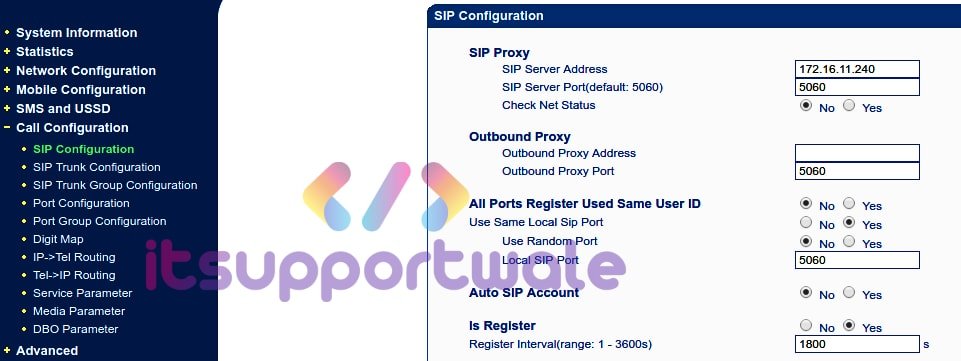
Remember to set Auto SIP Account option to NO and Is Register to Yes. Leave the rest of the settings as it is.
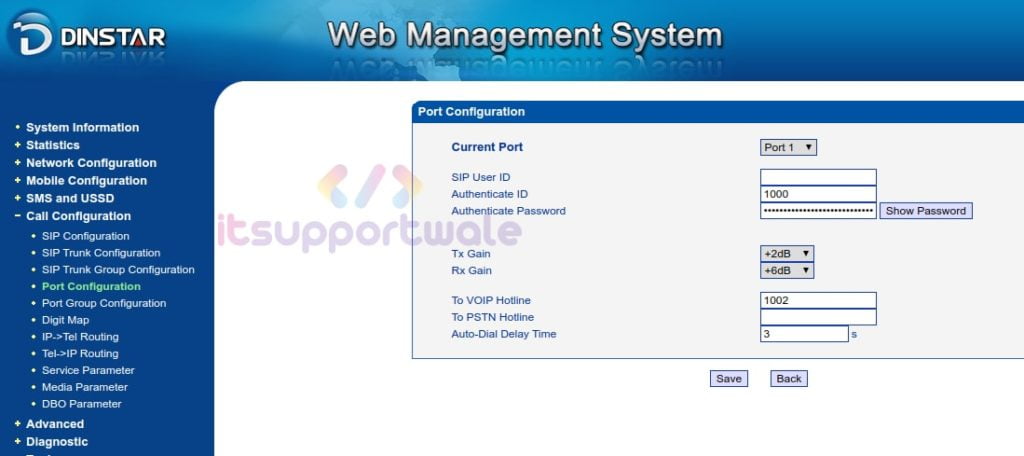
Step 4: Configure port with SIP account for incoming in GSM Gateway
In this step, we configure our GSM gateway port for incoming calls. Basically here we map each port with an SIP user account which is created on our FreePBX Server. So let’s start with navigating to the settings page via the below steps.
Go to Call Configuration ———> Port Configuration
Click on Details button, Every port has its own Details button. Open the Details of the Port which one you want to configure. Like below Image :

After that, Enter the Username and Secret which we created in FreePBX trunk incoming tab. Also, Enter the desired extension in VOIP Hotline, where you want to land the incoming call. In this example, the incoming call coming on port 1 is go to extension 1002.
Step 5: Configure Outgoing in Dinstar GSM Gateway
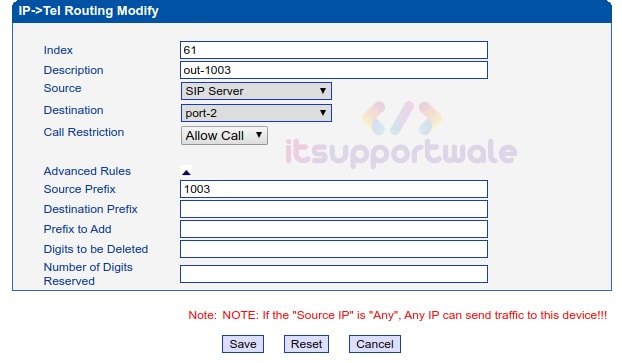
For configure outgoing calls in Dinstar GSM Gateway, Goto IP->Tel Routing option and click on Add.
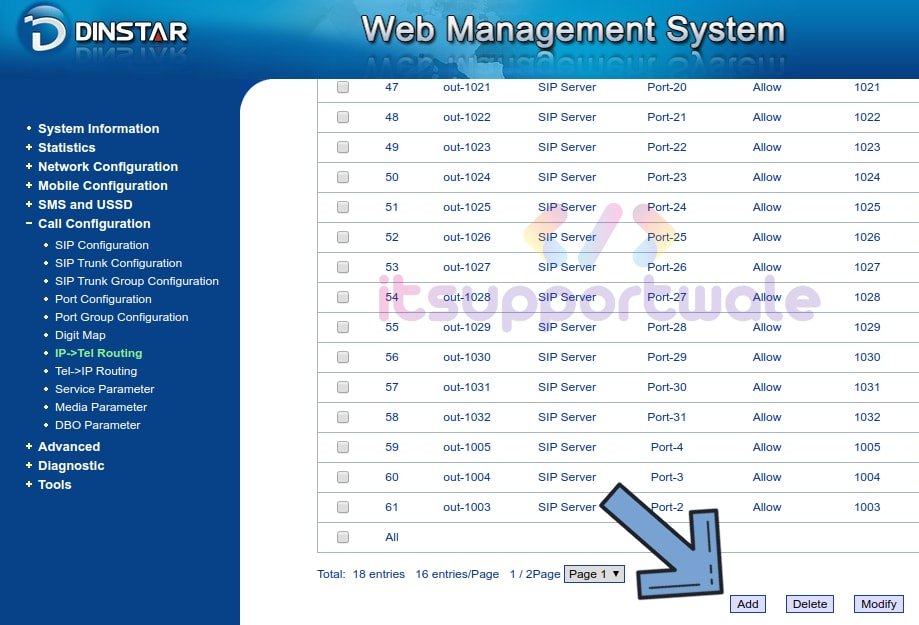
After that, select a port number from which you want to make outgoing calls And Enter an Extension in Source Prefix for bind that extension with the selected port number. Now click on save when done. For example, in the below screenshot, all the calls dialed from extension 1003 are going through port number 2 in the GSM Gateway.
Step 6: Configure Incoming in Dinstar GSM Gateway
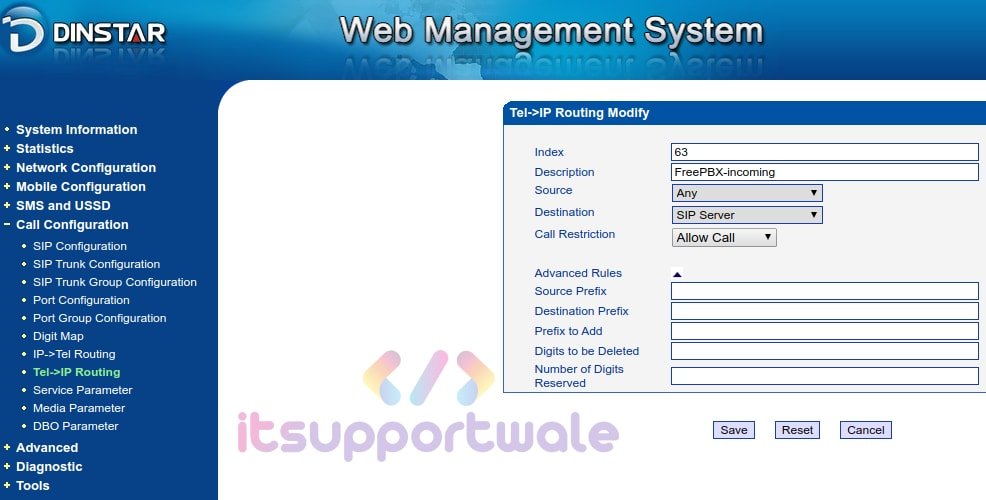
After that, We have to configure Incoming calls in our GSM Gateway. For this Goto, Tel->IP Routing and click to Add.
For Incoming Calls, we only have to pass all the incoming calls to the FreePBX server. Because we already configure all ports with VOIP Hotline in the previous step.
See the below image for example.
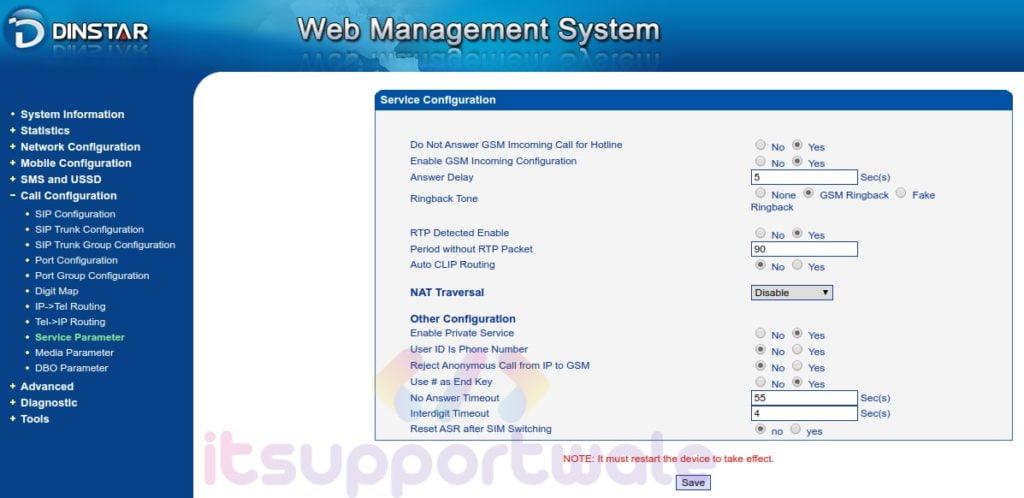
After that, Goto Service Parameter and check the other configurations.
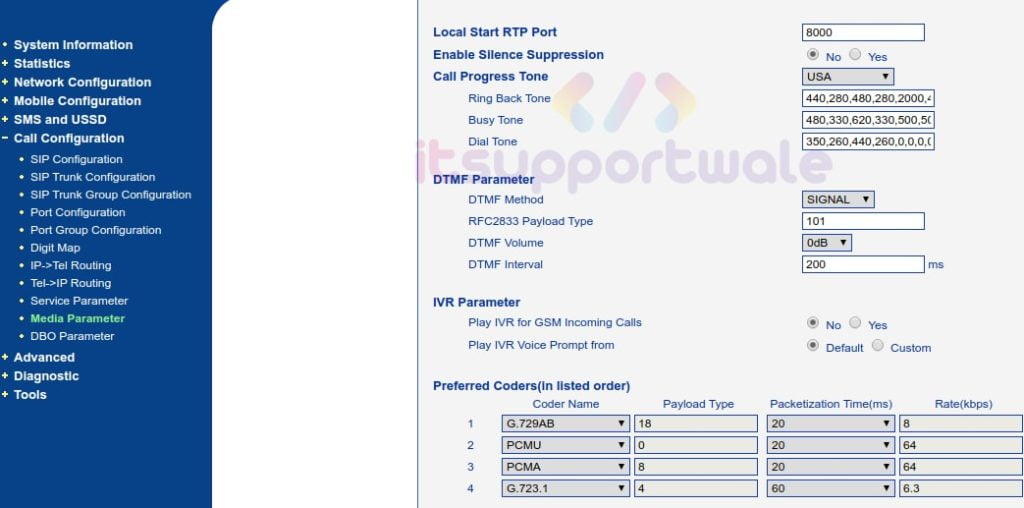
Now Goto Media Parameter and also check the configuration of other media options like IVR.
Finally, all the configuration is done and our setup is ready for making our first call.
Insert the SIM card in the port which you have configured in GSM Gateway and register an Extension on Softphone or Mobile Phone and try to make your first call.
If you face any problem in the configuration, you can ask in the comment section.
Summary:
In this article, we learn, How to Configure Dinstar GSM Gateway with the FreePBX server for Outgoing and Incoming calls. I hope you will successfully learn the process and you can suggest to me if I missed something. Happy Learning …!!!
Also Read: CentOS 8 installation with Screenshots
i need help setting this up with grandstream ucm
Hello
how to setup dinstar volte gateway for grandstream UCM 62XX
Are these processes the same if I want to configure Dinstar GSM Gateway with MyPBX SOHO?
Hi I am using dinstar and elastix, out of 16 ports I want to divide 8 ports to one product and another 8 ports to another product.
Can you explain the process. As of now i am using all ports to one product.
please describe. What the product means in your question.
Hi
Need the end to end setup from your team.
Hi
i m using my own server asterisk and im looking how can config dinstar easy way, I was using Goip gateways have two easy options Trunk mode and single mode both are just fill tree box and start calling all other feild ready
is there a way easy to configure dinstar?
Thanks
abdi
I need step by step on how to setup dinstar on ucm6208
hello dears,
I faces a issue all inbound call working normally, but when I dial oubound call dropped after 40 sec
Did u find any solution for this issue ?
I need step by step on how to setup dinstar on ucm6208
i needed to replace an goip 4 becuse of the decomisioning of 2/3g now ownung a UC2000 .. the Goip was setup in minutes .. im hours without any success .. worst is only found tip’s about freepbx where you never know what the real config block is until install freepbx just to find out.
what i basically dont get is whi the heck the gateway is registering as a user . just the oposite i expect i nee to send the call do the gateway which is seen as an user ??!!
does anyoone have an example for an plain asterisk ?
second problem is, before the incomming SMS where send as simple message to the asterisk .. seems not to be existing, any idea to bring SMS in asterisk ?
still need help?
How long takes call to be routed from gsm gateway to the pbx
On me usually takes two beeps and I’m trying to reduce it but unfortunately can’t