CentOS 8 was released on 24.09.2019 with lots of new features. In this tutorial, we learn CentOS 8 installation on VirtualBox or on a Physical machine.
- Also Read: How To Install MySQL 8 On Ubuntu 18.04
Table of Contents
Step 1: Download CentOS 8 ISO Image
You can easily get an ISO image of all released versions of CentOS. On the website of CentOS, you can get the list of all available mirrors in the world. For better download speed choose the mirror in your region.
- Get the list here: https://www.centos.org/download/mirrors/
- Or direct download ISO from here: http://isoredirect.centos.org/centos/8/isos/x86_64/
After Download the ISO image, you can verify the image with the size and SHA256 hash value given Here.
Step 2: Create a bootable USB drive
After download the ISO image the next thing we required is a bootable USB drive.
On a Windows PC, you can create a bootable USB of CentOS by using YUMI or RUFUS or LiLi. All are very simple and reliable ways to make a bootable USB.
If you on Linux then you can create bootable USB using the dd command like the below example.
sudo dd if=/path_to_iso_file/CentOS-8-x86_64-1905-dvd1.iso of=/dev/sdb status=progress && syncNote: replace path_to_iso_file with your iso file path and also replace /dev/sdb by your USB device path. If you don’t know your USB device path you can run the below command to see it.
sudo lsblkVirtual Box
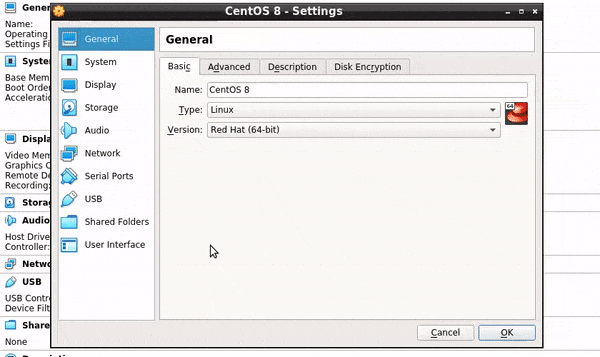
For installation in Virtual Box, we do not need a bootable USB media. You can just click on Create New Virtual Machine and Select Redhat 64 Bit.
Also, allot RAM and Storage according to your choice.
Remember a minimum of 1.5 GB RAM and 10 GB HDD is required.
Now go under the Storage option and choose CentOS 8 ISO image file in Virtual Optical Drive.
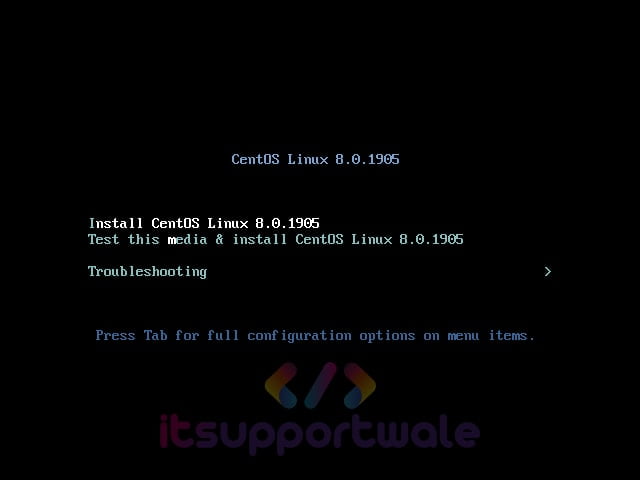
Step 3: Begin the CentOS 8 installation
Finally, boot from your bootable USB media and start the CentOS 8 Setup.
Step 4: Choose installation language Language
Here you can choose the language for the installation process.
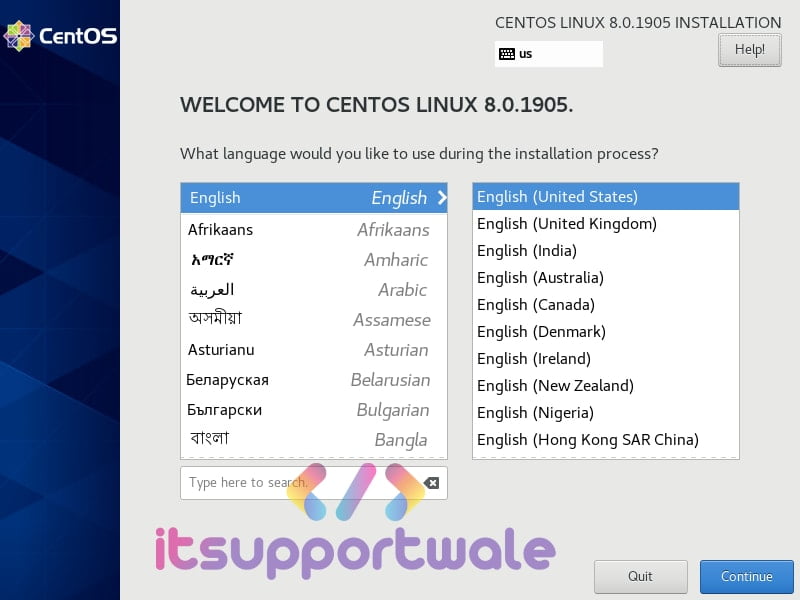
When you click on continue, You will see the below page.
Step 5: Select the keyboard language
Here you can choose the keyboard language for the installation process. The default is English (United States).
In this section, you can choose between different languages and also can test it by typing some text in the given textbox.

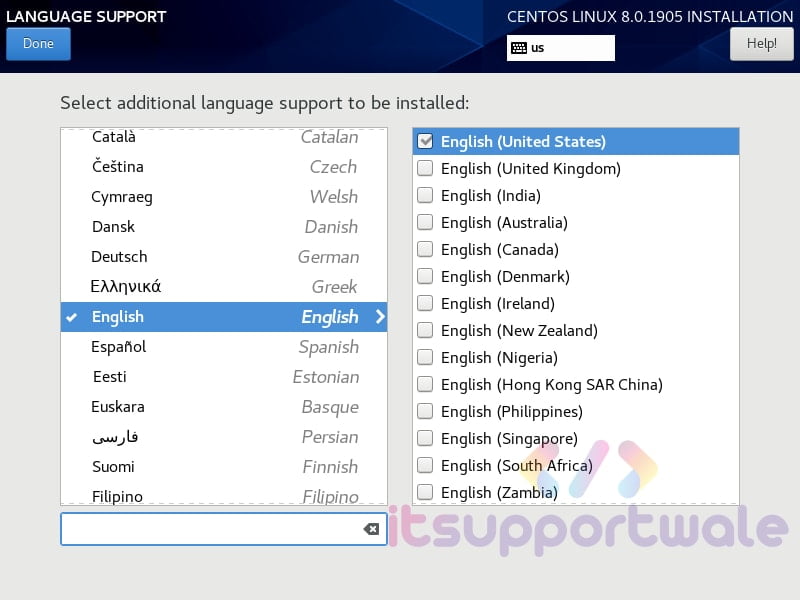
Step 6: Configure Language
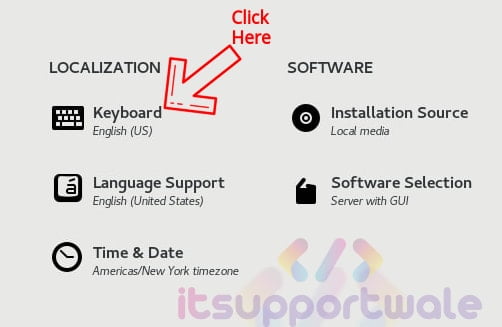
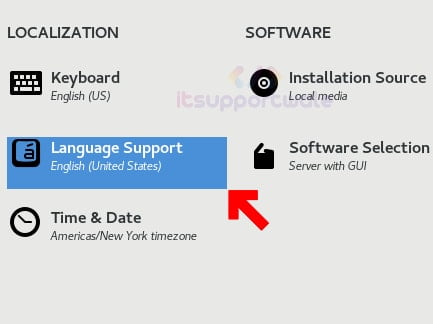
In localization, section click on Language Support to choose the language for OS.
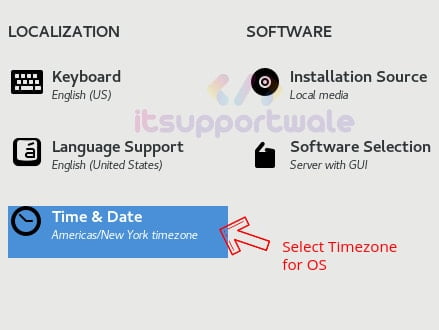
Step 7: Select the location and the timezone
After that, click on Time & Date for selecting Timezone and the location.

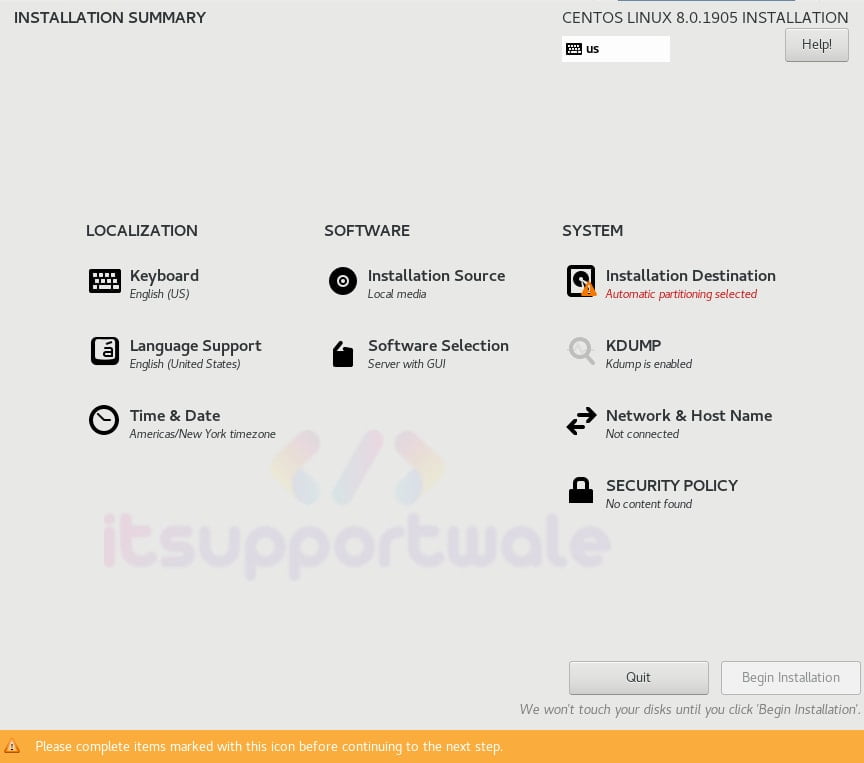
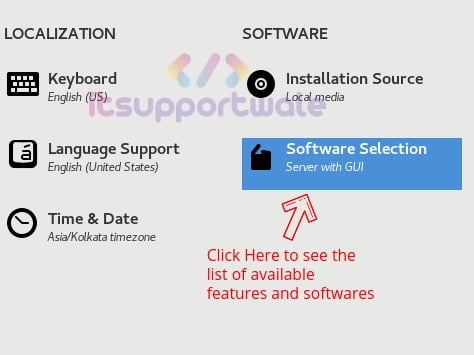
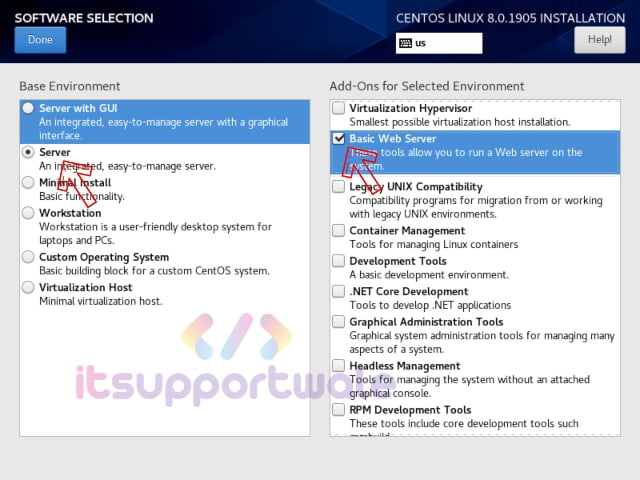
Step 8: Select Software and features to install
In the software section, the installation source is automatically selected. Below that, the Software selection option is available. Here you can select which features and software you want to install during installation.
By default, the server with the GUI option is selected. You can choose between various Base Environment and select Add-Ons for selected Environment.
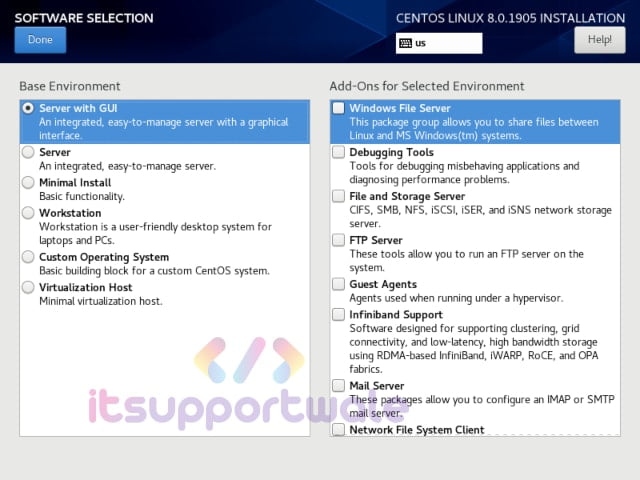
For Example, You want a Basic WEB server without GUI then just select the following options.
Step 9: Choose the partitioning scheme
Note: Be careful when making choices in this process. You may lose your data if the wrong option selected.
In the SYSTEM section, the first option is for configuring Disk partition and choose the installation destination for our server.
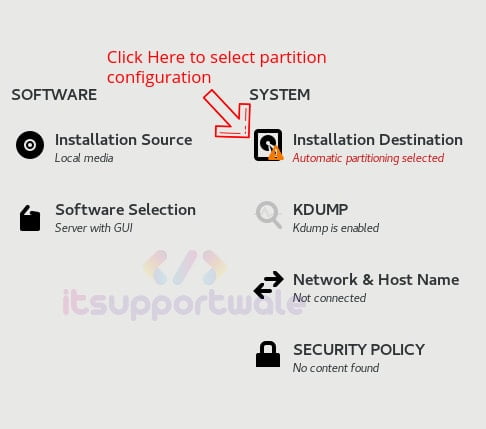
Disk partitioning is one of the most important parts of the OS installation.
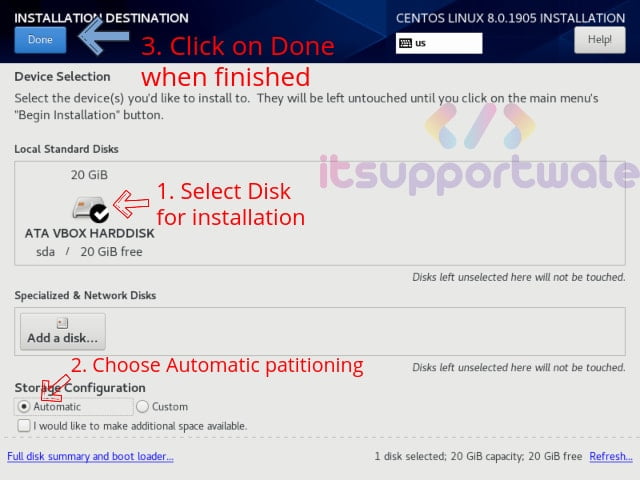
Step 9.1: Automatic Partition Configuration
If you do not want to create manual partitions, just select the disk, select Storage Configuration as automatic and click on Done. In this method, all the disk space is used and partitions are created automatically.
Note: This process deletes all your partitions and data on the disk.
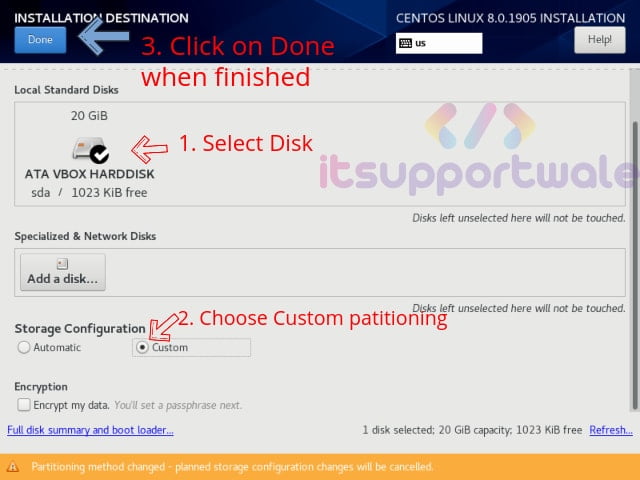
Step 9.2: Custom Partition Configuration
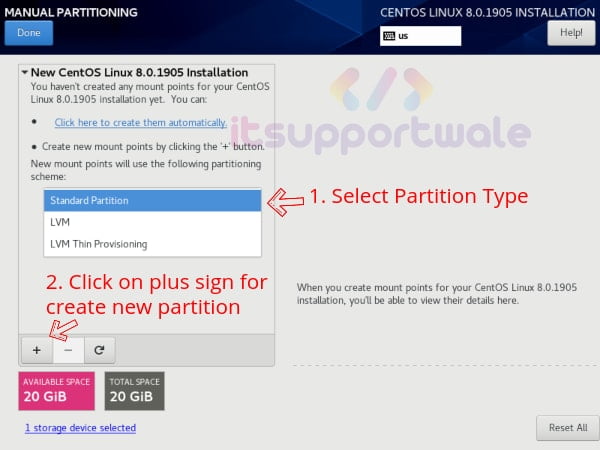
If you want to install CentOS 8 on a disk, where you already have some partition then you should select the custom partition option.
After that, you will the below menu where you have to select the partition scheme and create new partitions. For example, in the below image I select the Standard partition scheme.
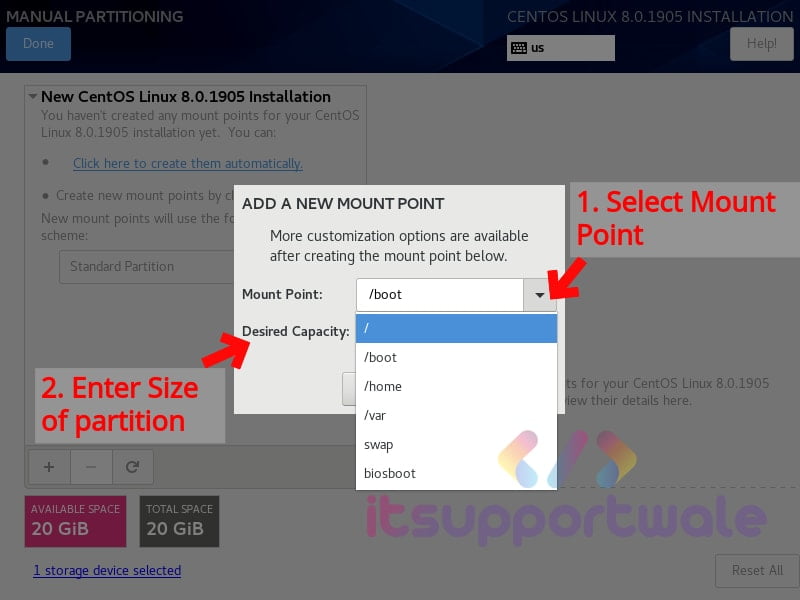
Now, We have to create mount points like the image below.
After creating all the necessary mount points, your partition table looks like the below image.
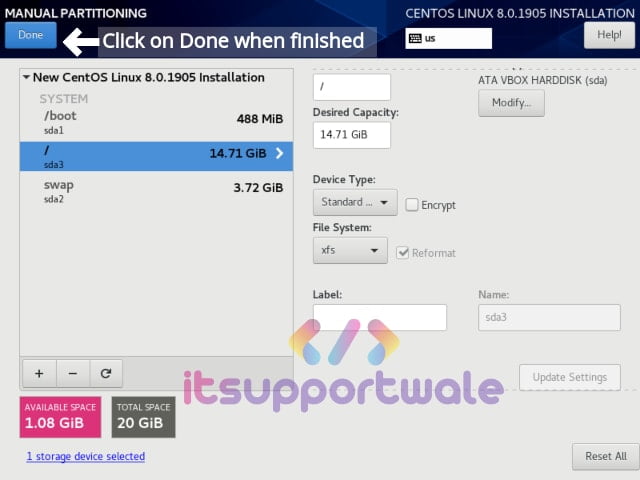
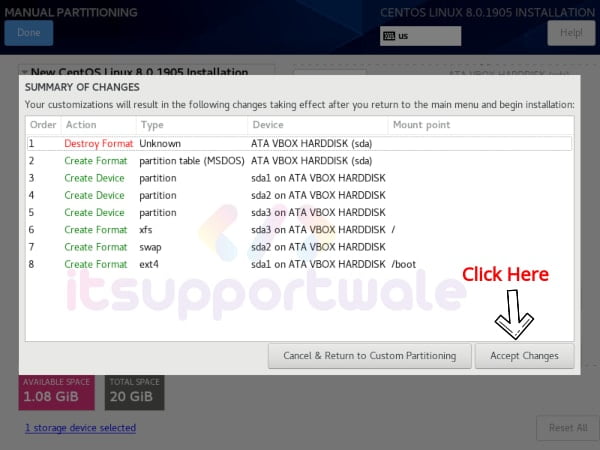
After that, verify all the changes will be done in the partition table and click on Accept Changes when done.
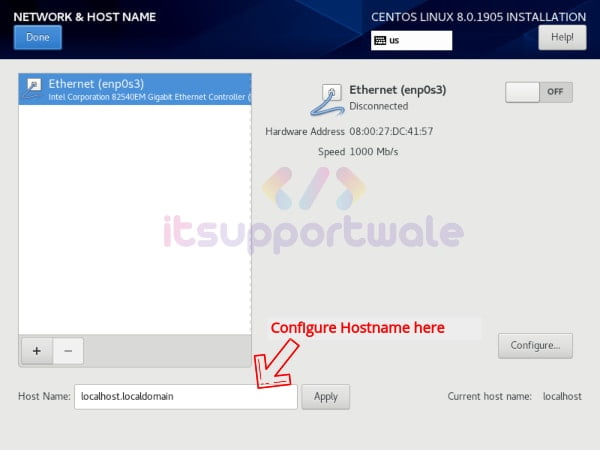
Step 11: Configure Network and Hostname
You should have a configured network connection during the installation process because the network connection is required to update all the components during installation.
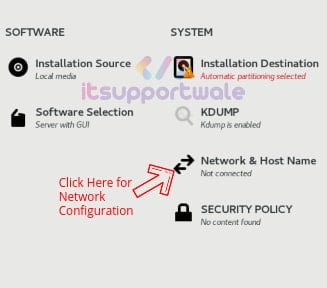
Also, you can define the hostname of the server.
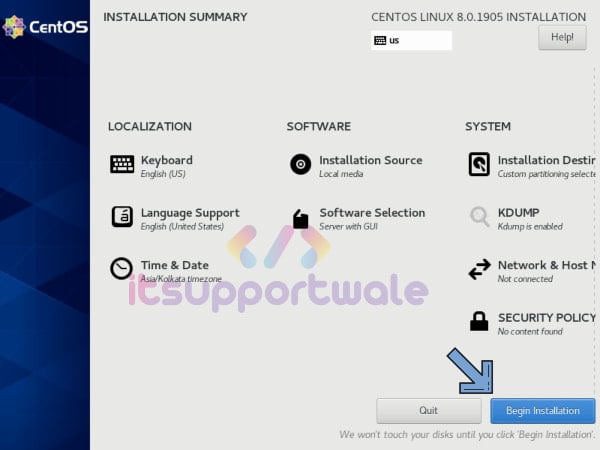
Step 12: Begin the installation
Now, we are ready to start the installation process of our CentOS 8 Server.
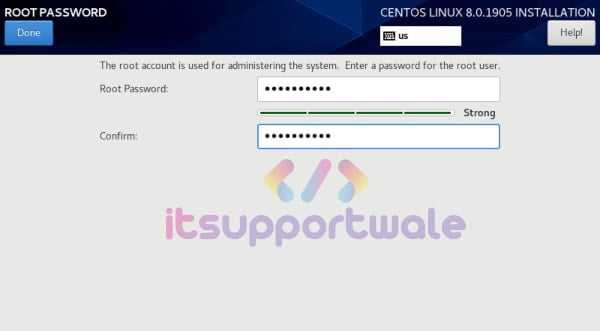
Step 16: Set the root password and create a user account
After that, the User Settings section needs to be configured.

Now set a strong password for the root user.
After that, create a user and set a strong password for that user.

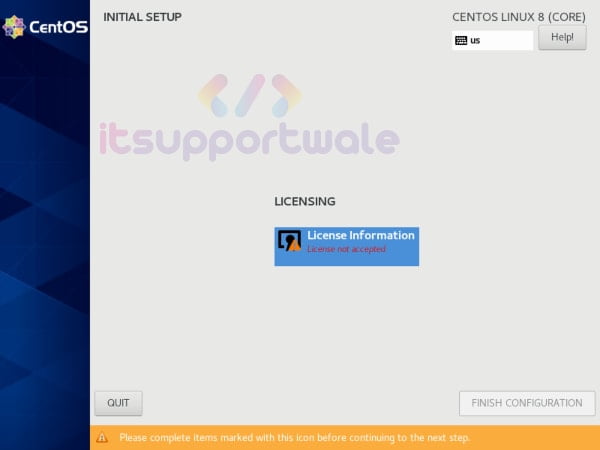
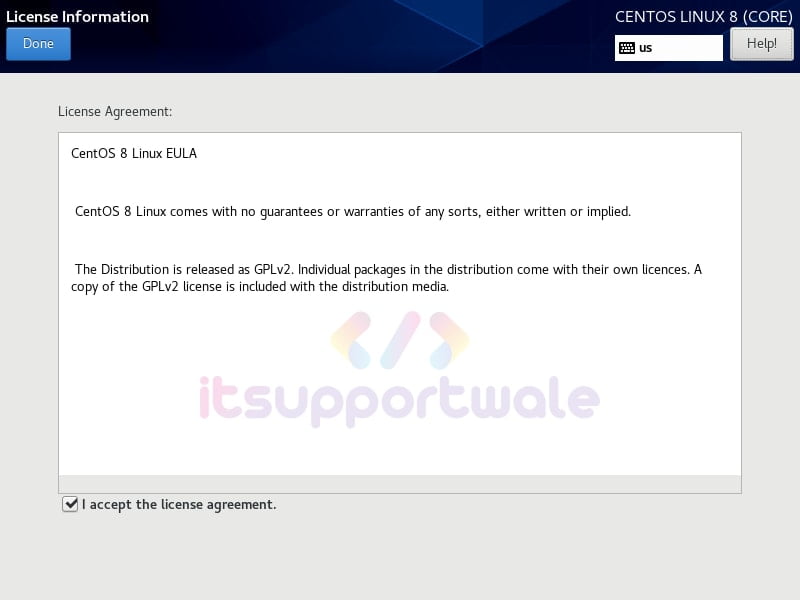
Step 18: Reboot and accept the license agreement
When the installation process is completed you have to reboot the server.
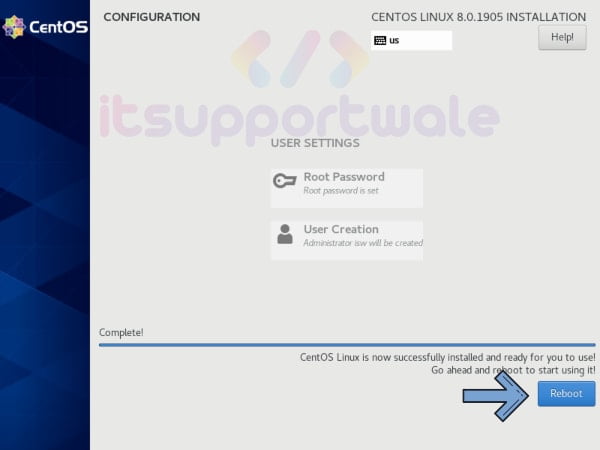
After reboot, you have to accept the license and finally Finish Configuration.
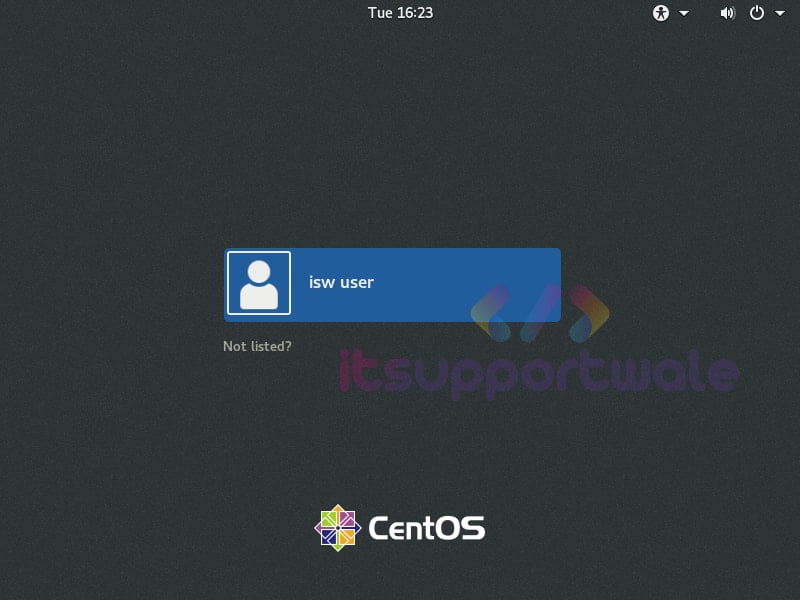
Step 19: Login in your New Centos 8 Machine
After that, you can log in with the user you created in the previous step.
Summary:
In this tutorial, we learn, how to install CentOS 8. I hope you like the way I write this tutorial. You can suggest to me in the comment section if something is missing. Happy Learning !!!
Hi there,
this is a very good blog I appreciate your work. thanks for sharing such useful information.