Nowadays, Ubuntu is not needed any introduction. Ubuntu is a well-known one of the leading Operating System used by World Wide users. Ubuntu Desktop and Server are Opensource from the beginning. Canonical has released the latest and stable version of Ubuntu 18.04 LTS Desktop (Bionic Beaver) on 26th April 2018. In this article, You will read about features and Minimum Requirements of Ubuntu 18.04 and also learn how to install Ubuntu 18.04 LTS along with screenshots.
Table of Contents
New features in Ubuntu 18.04 LTS
Ubuntu 18.04 LTS released with many of the Features and Fixes. Some of the major and important features and fixes are below :
- Linux Kernel version 4.15 which is Latest and Stable
- Updated LibreOffice 6.0
- ‘Minimal Installation‘ Option when installing
- Support and Updates for next 5 years till April 2023
- Weather forecast feature in the calendar
- Driverless printing support is now available
- OpenJDK 10 is the default JRE/JDK
Minimum System Requirement for Ubuntu 18.04 LTS (Desktop)
- 2 GB RAM
- Dual Core processor (2 GHz)
- 25 GB free HDD space
- Bootable Media (DVD or USB drive)
- Internet connection if you want to get updates and third party apps during installation (Optional).
Steps for installing Ubuntu 18.04 LTS (Desktop) in your Laptop or PC
Step 1: Download the ISO image of Ubuntu 18.04 LTS (Desktop)
If you do not have the latest ISO of the Ubuntu 18.04 LTS then you can download it from the Official Website of Ubuntu. Below
https://www.ubuntu.com/download/desktop
Remember, that Ubuntu 18.04 is available in only 64-bit edition so you can installl it on only 64-bit architecture systems.
Step 2: Create a Bootable Media
After downloading the ISO of Ubuntu 18.04 Desktop the next step is to make a bootable media which is either a DVD or USB.
Also change the boot order from BIOS so that system boots from our bootable media which we create.
Learn More on “How to create Bootable Media of Ubuntu Desktop on Ubuntu“
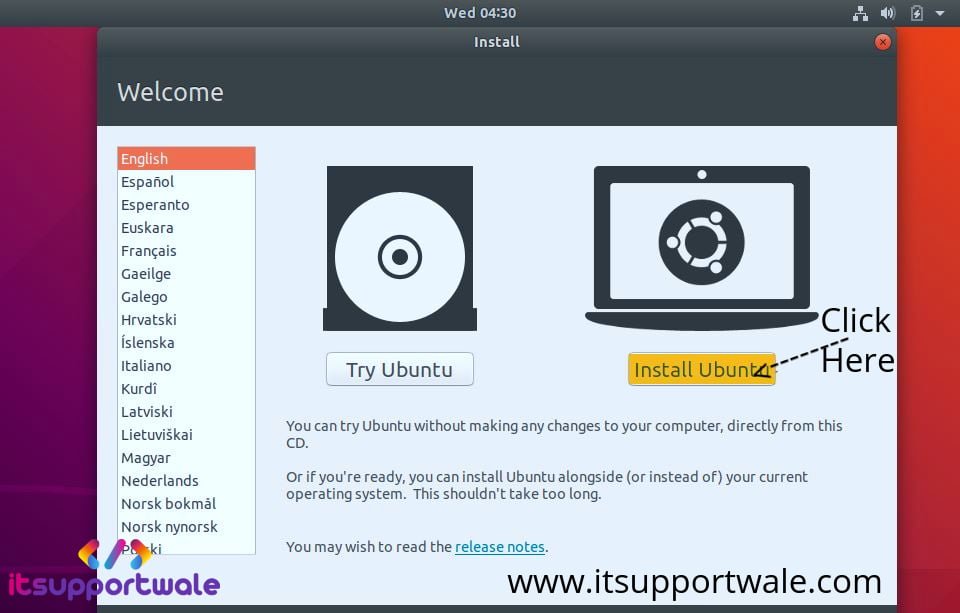
Step 3: Boot from Bootable Media
Plugin your DVD or USB and boot from it. When the system booted from the bootable media you will see the below screen with the options of Try Ubuntu and Install Ubuntu.
If you want to take a tour of the New Ubuntu 18.04 Desktop without installing it on your hard disk, then you can choose to Try Ubuntu. But here we want to install the ubuntu in hard disk so click on Install Ubuntu to continue.
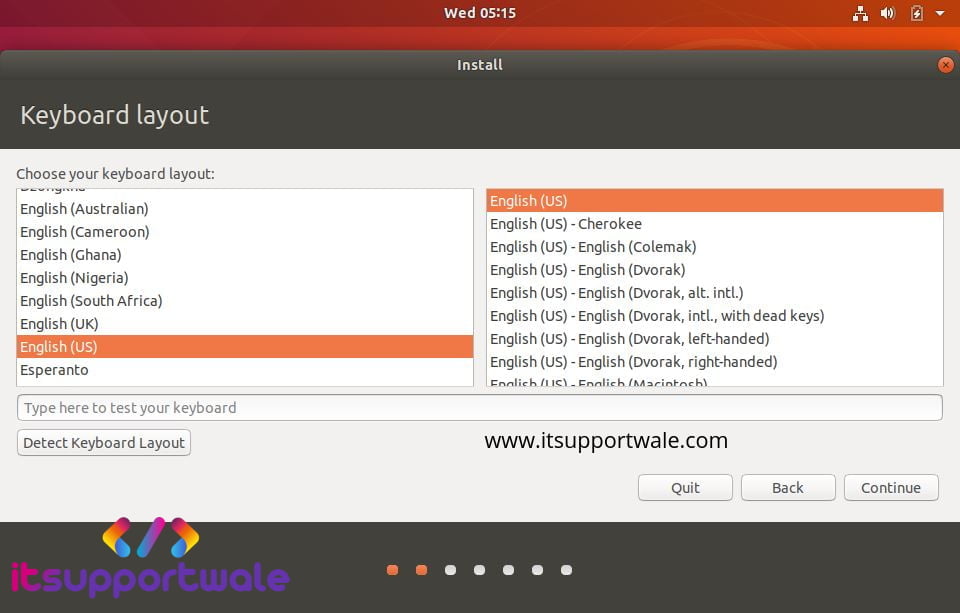
Step 4: Choose the Keyboard Layout and Type of Installation
Choose a keyboard layout that is suitable to your needs. Ubuntu 18.04 LTS Desktop comes with English(US) keyboard layout. You can see it in the below image :
After that, you will see the below screen where you have to choose the type of installation and update policy during installation.
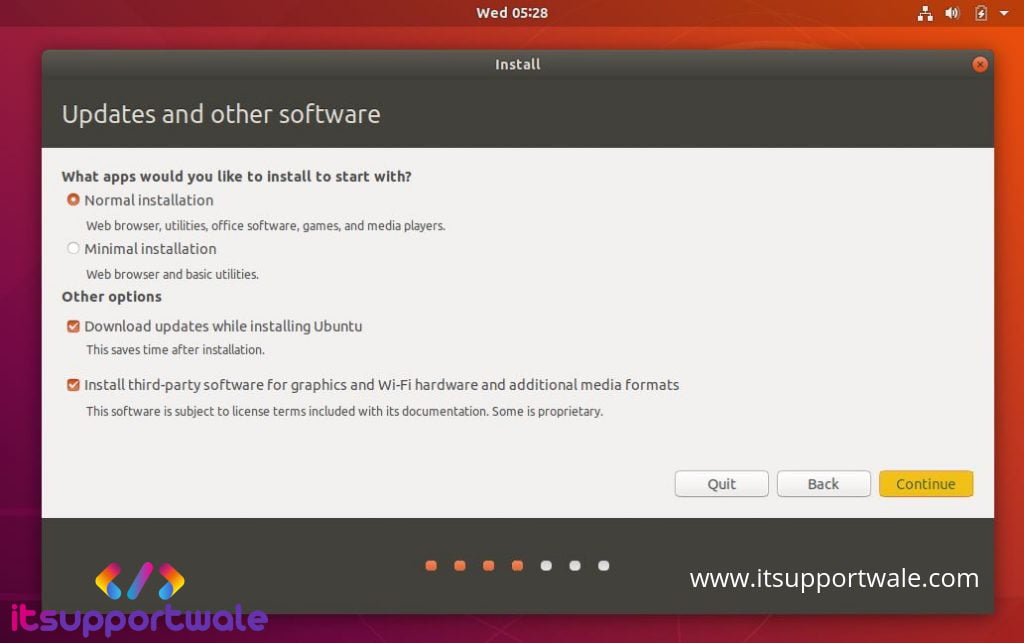
In type of installation we choose the Normal Installation which is Default. You can choose Minimal Installation if you do not want to install all the apps which are by default installed with Ubuntu 18.04 LTS Desktop. And select both the check boxes if you want to download the updates of Ubuntu during installation and also install the third party drivers for the WiFi and Graphic hardware.
After that click on continue for the next screen.
Step 5: Choosing the partition type
On the next screen you will have the following options for creating partitions:
- Erase Disk and Install Ubuntu
- Encrypt the new Ubuntu installation for security
- Use LVM with the new Ubuntu installation
- Something Else
For the sake of simplicity and keep this article short and sweet I choose the very first option which is recommended for a new empty hard disk, that is Erase Disk and Install Ubuntu.
You can learn more on “How to do Custom partitioning when installing Ubuntu“
Step 6: Choosing Time Zone
On the next screen choose the appropriate Time Zone which is applicable in your area.

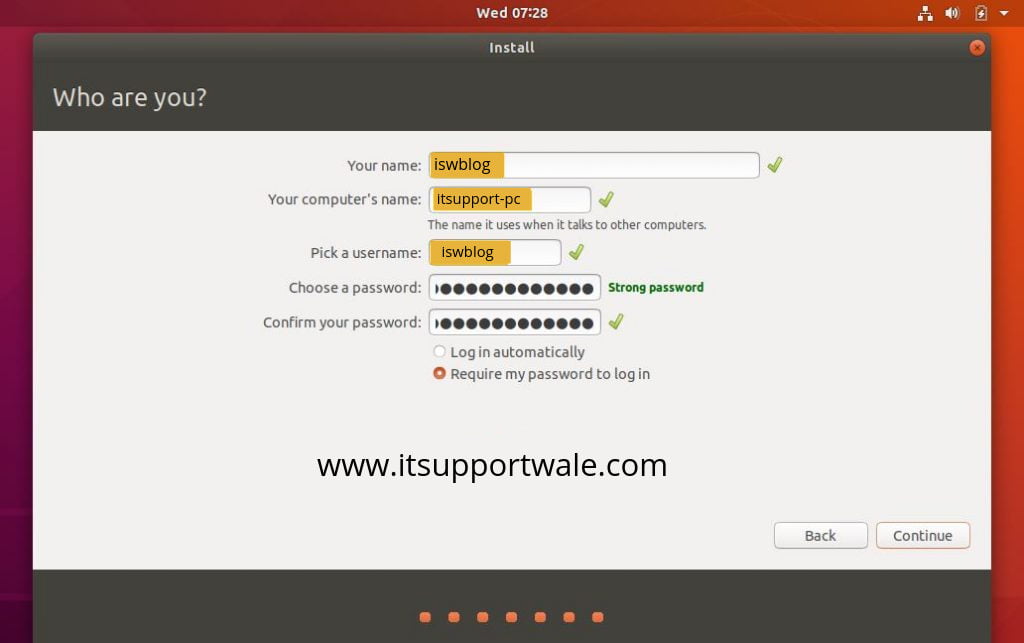
Step 7: Provide USER info and Finish it
On the next screen you will see the Who Are You? page. Provide the username and passwords and hit continue.
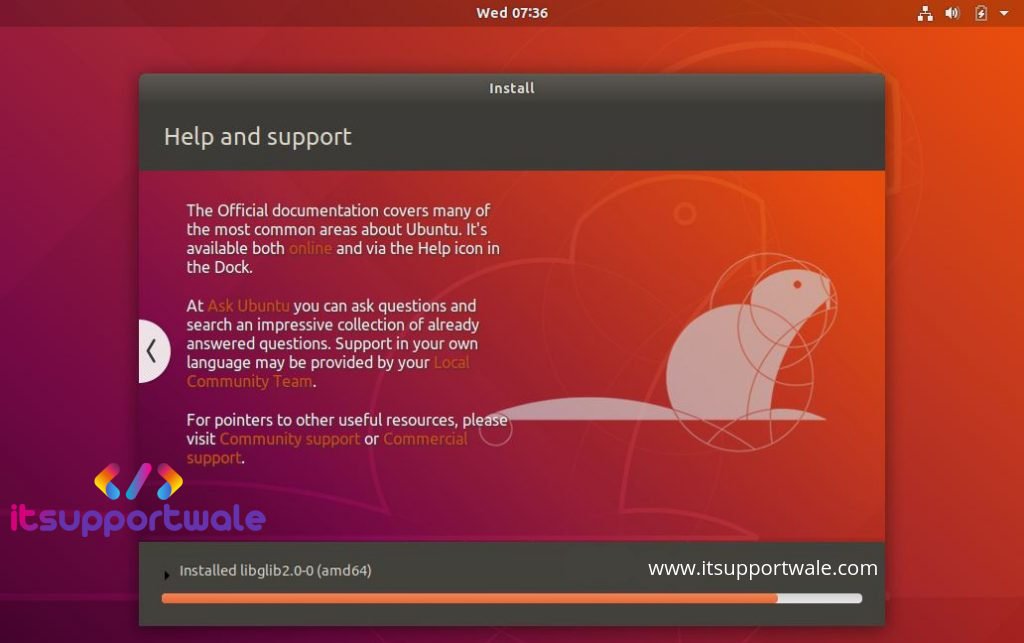
Now just click on the start button for intiate the installation and enjoy the info which is provided to you on the screen during installation.
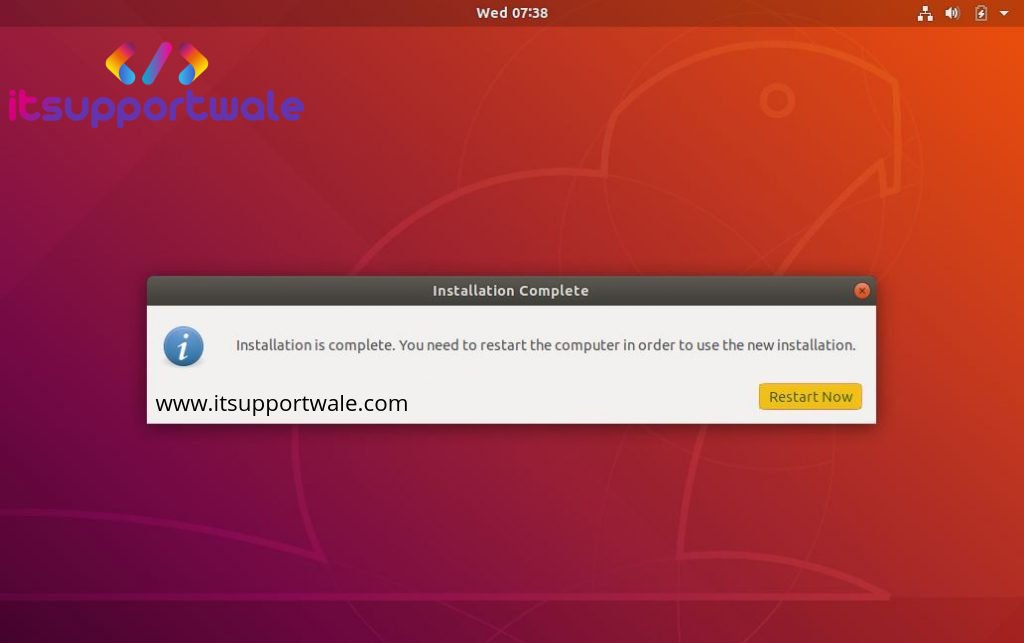
Atlast click on reboot and done. Yes you have done it. Login and have the very first look of the beautiful interface.
And the end comes. It was the step by step installation of Ubuntu 18.04 LTS Desktop. Now you have to do a little thing, write in the comment how you feel after learning a new thing. Happy Learning …!
You can also download the offline version of the Tutorial in TXT format Here: “Ubuntu 18.04 LTS Desktop Installation Text File“
Also Read: How to create manual partition when installing Ubuntu 18.04 Desktop