In this tutorial, we will install and configure Latest Nextcloud 17.0.2 on an Ubuntu 18.04 LTS server. As always we will do it one by one in Simple Steps.
Nextcloud is a fork of ownCloud used for file-sharing servers to store your personal data like documents and pictures in a centralized location, like Dropbox or Google Drive. Nextcloud is fully open-source software. Your data privacy and security are much better when you use a self-hosted server instead of using Third-party cloud services like Google Drive or Dropbox. Nextcloud is GDPR and HIPAA compliant, it gives you encrypted data with the ability to audit.
Table of Contents
Step 1: Install Apache Web Server
Nextcloud is a PHP based Web Application, So we need a web server for it. Apache is one of the most used Web Servers on the internet.
Install Apache2 Web Server by running the below command.
sudo apt update
sudo apt install apache2
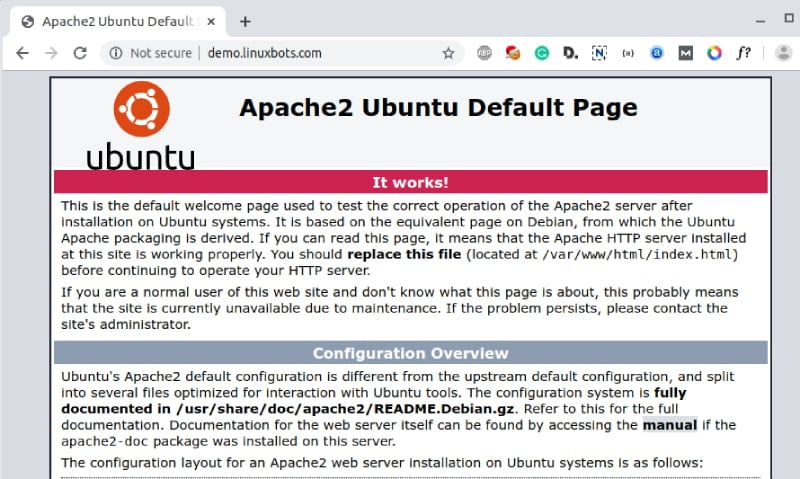
Verify that the Apache Web Server is installed correctly by pointing your browser at http://mydomain/ and replace the mydomain with your current FQDN. You should see output like the below image.
Step 2: Install PHP7.3 and it’s Additional Modules
PHP is one of the most used programming languages for creating Web Apps. The Current Stable release of PHP is 7.4.1 but PHP version 7.3 is recommended for better compatibility and stability.
For installing PHP 7.3 we have to add ppa:ondrej/php repository to our server by running the below command. Because the latest versions of PHP are not available in Ubuntu’s default repository.
sudo add-apt-repository ppa:ondrej/php
sudo apt-get update
So, now we can install PHP 7.3 and its additional modules by running the below command
sudo apt-get install php7.3 libapache2-mod-php7.3 php7.3-gd php7.3-json php7.3-mysql php7.3-curl php7.3-mbstring php7.3-intl php-imagick php7.3-xml php7.3-zip
sudo service apache2 restart
After that, Verify that PHP is installed successfully by running the below command.
php -vOutput:
root@demo:~# php -v
 PHP 7.3.13-1+ubuntu18.04.1+deb.sury.org+1 (cli) (built: Dec 18 2019 14:48:49) ( NTS )
 Copyright (c) 1997-2018 The PHP Group
 Zend Engine v3.3.13, Copyright (c) 1998-2018 Zend Technologies
     with Zend OPcache v7.3.13-1+ubuntu18.04.1+deb.sury.org+1, Copyright (c) 1999-2018, by Zend Technologies
After that, we create a PHP file for verifying that apache can process PHP files successfully. You can create the test file by simply running the below command.
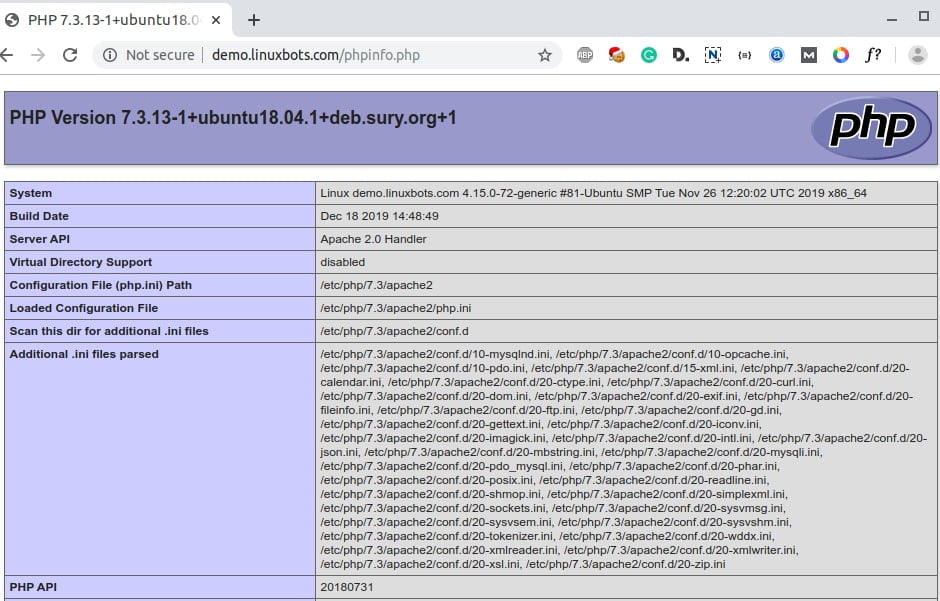
echo "<?php phpinfo( ); ?>" > /var/www/html/phpinfo.phpNow point your browser at the following URL http://mydomain/phpinfo.php. You should Output like the below image.
Now we have successfully installed Apache Web Server and PHP 7.3 on our server. So let’s move on to the Database part now.
Step 3: Install and Configure MariaDB Server
If you are looking for a fully open-source and reliable solution for a relational database, you should go with MariaDB Server because it’s one of the most used DB servers on the Internet.
Adding the MariaDB Latest Stable Version Repository
MariaDB may not be listed in Ubuntu 18.04 Default repositories. Therefore we have to add the MariaDB repository manually. So you can add it by running the below command.
For Ubuntu 18.04 LTS
sudo apt-get install software-properties-common
sudo apt-key adv --recv-keys --keyserver hkp://keyserver.ubuntu.com:80 0xF1656F24C74CD1D8
sudo add-apt-repository 'deb [arch=amd64,arm64,ppc64el] http://mirror.host.ag/mariadb/repo/10.4/ubuntu bionic main'
sudo apt update
For Ubuntu 16.04 LTS
sudo apt-get install software-properties-common
sudo apt-key adv --recv-keys --keyserver hkp://keyserver.ubuntu.com:80 0xF1656F24C74CD1D8
sudo add-apt-repository 'deb [arch=amd64,arm64,i386,ppc64el] http://mirror.host.ag/mariadb/repo/10.4/ubuntu xenial main'
sudo apt update
After that, we have the MariaDB packages listed in our servers repositories. For Confirm you can run the below command.
sudo apt list | grep mariadb-As a result, you should see the output like below
root@demo:~# apt list | grep mariadb-
 WARNING: apt does not have a stable CLI interface. Use with caution in scripts.
 libmariadb-dev/unknown 1:10.4.11+maria~bionic ppc64el
 libmariadb-dev-compat/unknown 1:10.4.11+maria~bionic ppc64el
 mariadb-backup/unknown 1:10.4.11+maria~bionic ppc64el
 mariadb-client/unknown,unknown,unknown 1:10.4.11+maria~bionic all
 mariadb-client-10.4/unknown,now 1:10.4.11+maria~bionic amd64 [installed,automatic]
 mariadb-client-core-10.4/unknown 1:10.4.11+maria~bionic ppc64el
 mariadb-common/unknown,unknown,unknown,now 1:10.4.11+maria~bionic all [installed,automatic]
 mariadb-server/unknown,unknown,unknown,now 1:10.4.11+maria~bionic all [installed]
 mariadb-server-10.4/unknown 1:10.4.11+maria~bionic ppc64el
 mariadb-server-core-10.4/unknown 1:10.4.11+maria~bionic ppc64el
 mariadb-test/unknown 1:10.4.11+maria~bionic ppc64el
 mariadb-test-data/unknown,unknown,unknown 1:10.4.11+maria~bionic all
So, now we have to install MariaDB Server which you can do by running the below command.
sudo apt install mariadb-serverInstall MariaDB Server
After installation, we can now verify that the installation is successful and our MariaDB server is up and running by using the below command.
sudo apt install mariadb-serverOutput:
root@demo:~# service mariadb status
 ● mariadb.service - MariaDB 10.4.11 database server
    Loaded: loaded (/lib/systemd/system/mariadb.service; enabled; vendor preset: enabled)
   Drop-In: /etc/systemd/system/mariadb.service.d
            └─migrated-from-my.cnf-settings.conf
    Active: active (running) since Tue 2020-01-07 04:43:41 UTC; 59s ago
After that, run the below command for setting up a root password for our Database and prevent remote access.
mysql_secure_installationAs a result, you will see the below choices.
- Enter current password for root (enter for none): Just press the Enter
- Switch to unix_socket authentication [Y/n]: n
- Change the root password? [Y/n]: y
- New password: Enter the new password
- Re-enter new password: Repeat the new password
- Remove anonymous users? [Y/n]: y
- Disallow root login remotely? [Y/n]: y
- Remove test database and access to it? [Y/n]: y
- Reload privilege tables now? [Y/n]: y
After that restart the MariaDB Server by using the below command.
service mariadb restartNow test if you can log in into the database server by using the below command.
sudo mysql -uroot -pOutput:
root@demo:~# mysql -uroot -p
 Enter password:
 Welcome to the MariaDB monitor.  Commands end with ; or \g.
 Your MariaDB connection id is 38
 Server version: 10.4.11-MariaDB-1:10.4.11+maria~bionic-log mariadb.org binary distribution
 Copyright (c) 2000, 2018, Oracle, MariaDB Corporation Ab and others.
 Type 'help;' or '\h' for help. Type '\c' to clear the current input statement.
 MariaDB [(none)]>
Create a Database for the Nextcloud Server
Create a blank database in MariaDB for the Nextcloud server By running the below command.
mysql -uroot -p -e "CREATE DATABASE nextcloud;"Now create a user for the above database by using this command. Remember to replace my_password with a strong password.
mysql -uroot -p -e "CREATE USER 'nextclouduser'@'localhost' IDENTIFIED BY 'my_password_here';"Giving full permission to the nextcloud user for the Database by using the below command.
mysql -uroot -p -e "GRANT ALL ON nextcloud.* TO 'nextclouduser'@'localhost' WITH GRANT OPTION;"After that, apply changes with the below command.
mysql -uroot -p -e "FLUSH PRIVILEGES;"After that, we have our Web Server and Database Server up and running. Now We are ready to install the Nextcloud Web App in our Server.
Step 4: Download and Install Nextcloud 17.0.2
The latest stable version of Nextcloud is 17.0.2 which is released on 20 December 2019. Download the zip file by running this command.
cd /var/www/
wget https://download.nextcloud.com/server/releases/nextcloud-17.0.2.zip
If unzip is not installed then run this command to install unzip.
sudo apt-get install unzipAfter that, Unzip the downloaded file by using this command.
unzip nextcloud-17.0.2.zipApply the required permissions to the extracted folder by using this command.
chown -R www-data:www-data /var/www/nextcloud/
chmod -R 775 /var/www/nextcloud/
Configure Apache for Nextcloud
After unzipping the files, we have to configure apache for serving the nextcloud directory as our root directory. For configuring apache disable the default host configuration by using this command.
a2dissite 000-default.confNow we create a new file with a custom configuration for our Nextcloud server. So create a new file in apache sites-available directory by using this command.
vim /etc/apache2/sites-available/nextcloud.confNow copy and paste the below configuration in the file and save it. Remember to replace example.com by your own domain name.
<VirtualHost *:80>
     ServerAdmin [email protected]
     DocumentRoot /var/www/nextcloud/
     ServerName example.com
     ServerAlias www.example.com

     <Directory /var/www/nextcloud/>
        Options +FollowSymlinks
        AllowOverride All
        Require all granted
          <IfModule mod_dav.c>
            Dav off
          </IfModule>
        SetEnv HOME /var/www/nextcloud
        SetEnv HTTP_HOME /var/www/nextcloud
     </Directory>

     ErrorLog ${APACHE_LOG_DIR}/nextcloud_error.log
     CustomLog ${APACHE_LOG_DIR}/nextcloud_access.log combined

</VirtualHost>
Enable the nextcloud config and apache rewrite module
After creating a configuration file for our nextcloud server we have to enable it by using the below command.
sudo a2ensite nextcloudApache rewrite module is recommended for the nextcloud. So Enable it by running the below command.
sudo a2enmod rewriteAfter that, restart the apache web server by running this command.
sudo service apache2 restartAs a result, you can see the initial configuration page when you point your browser to your domain.
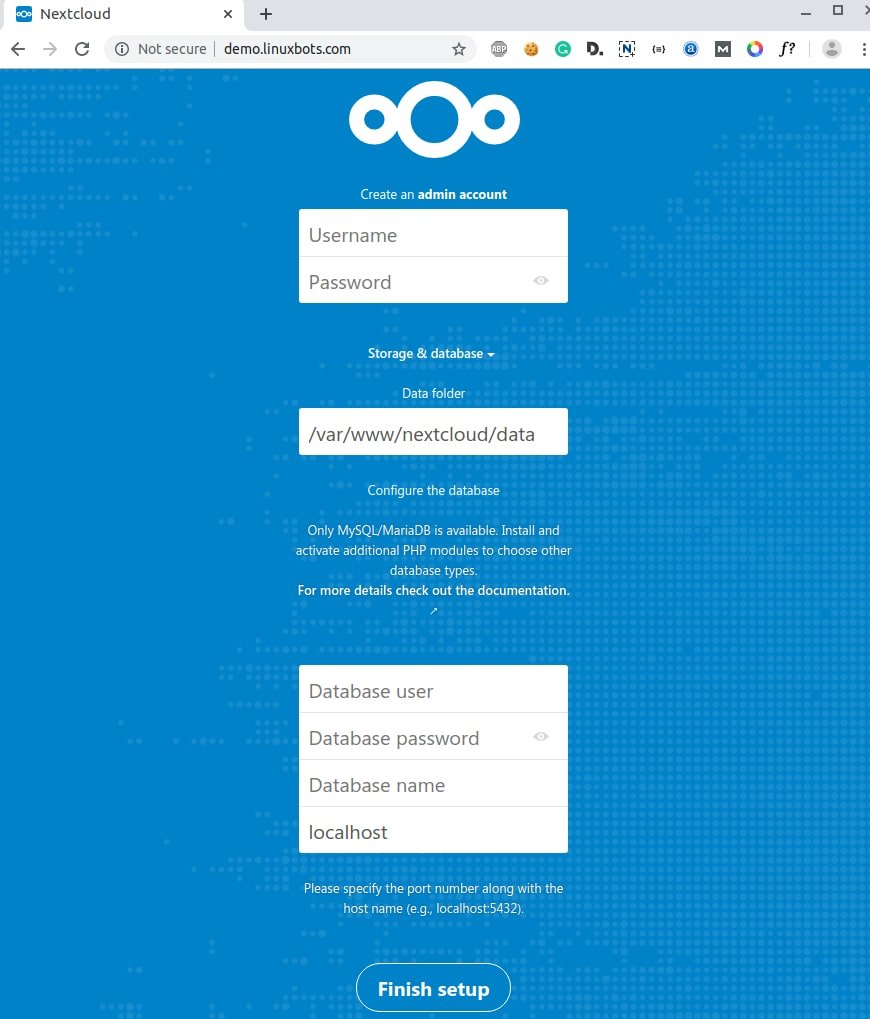
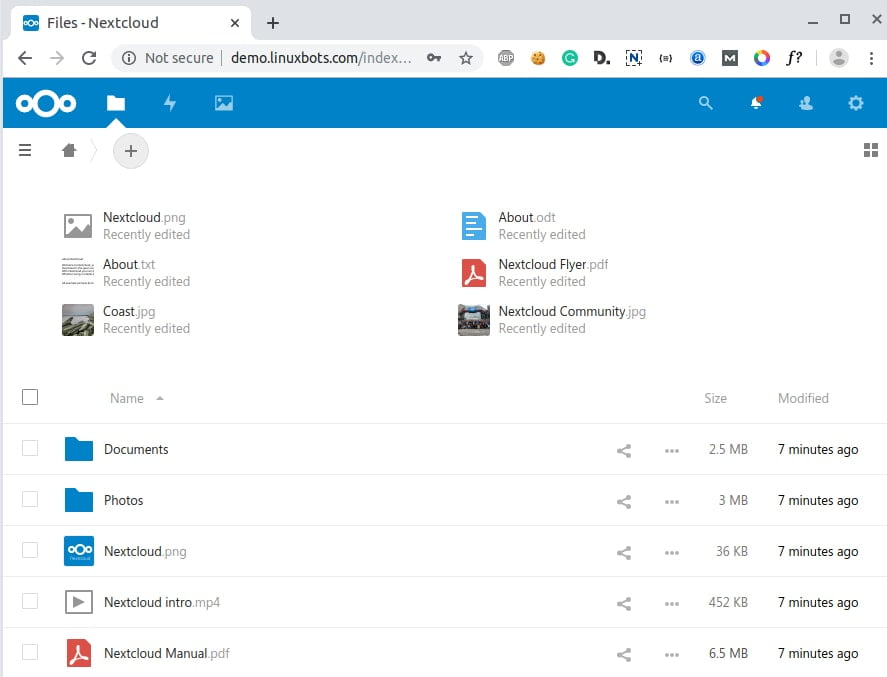
Provide the required details and click on Finish Setup. You can see the below screen after you click on the Finish setup button.
Conclusion:
In this article we learn, How to install and configure Nextcloud 17 Server with Apache, PHP 7.3 and MariaDB. You can share your thoughts and suggestions in the comment section. Share It if you like the article.
- Also Read: Print Awesome ASCII Text in Linux Terminal
