When you are working from home or want to access a Ubuntu system that is on a different location, the best way is to set up Ubuntu’s Built-in “Screen Sharing” feature. This Remote Desktop feature gives you control over your Desktop from any other location with the help of any computer or mobile device.
The Built-in feature of Ubuntu supports both VNC and RDP protocols for Remote Desktop Sharing. Follow the below simple steps to use the Ubuntu Remote Desktop software.
Table of Contents
Methods to control Ubuntu Remotely
Mainly we are having three different methods to connect Ubuntu remotely :
- SSH: Secure Shell
- VNC: Virtual Network Computing
- RDP: Remote Desktop Protocol
SSH is the most used method for remote connections. However, SSH does not have any GUI (Graphical User Interface) support.
The remote desktop tool in Ubuntu supports all the three methods SSH, VNC, and RDP also supports SFTP protocol. We do not need to install any other app to use these features.
Remote Desktop to Ubuntu using VNC
Ubuntu comes with a remote desktop feature named “Screen Sharing”. This feature is using the VNC (Virtual Network Computing) protocol for remote connections. Setting up this VNC feature is super easy. You do not need to install any software or run any command in the terminal for this.
There are only two steps for making a connection using VNC in Ubuntu. So let’s start with the first process.
Step 1: Enable Screen Sharing in Ubuntu
At the very first step, you need to enable the screen sharing feature in Ubuntu Desktop.
For this, go to settings.
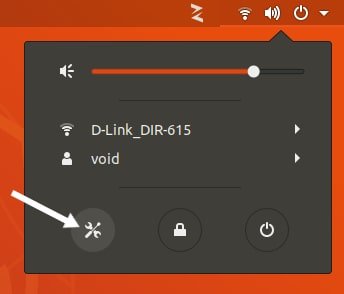
Then navigate to the Sharing tab and click on the Screen Sharing option.

After that click on the button and turn it on to enable the VNC feature.
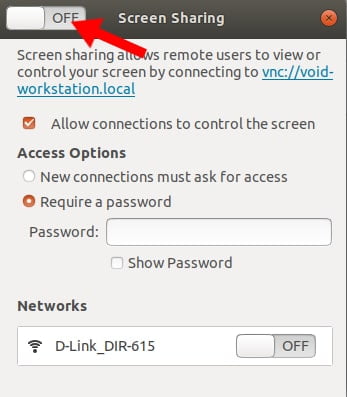
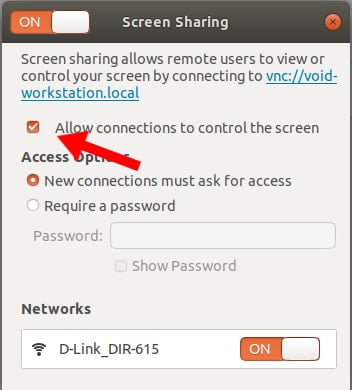
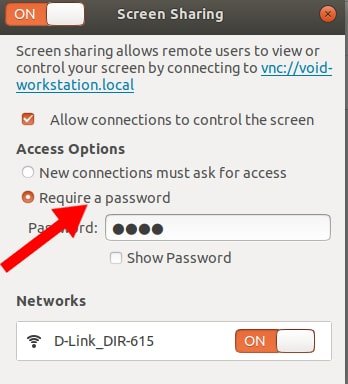
In the next step, you will get some options. If you only want to share the screen using VNC then you have to uncheck the Allow connections to control the screen option. But in this tutorial, we will keep it enabled because we want to control the system using VNC.
The next option is Access Options:
- New connection must ask for access – choose this if you want to accept the request manually every time
- Require a Password – choose this if you want to make the connection without manually accepting it
For this tutorial, obviously we want to access it without any manual acceptance on the remote site. So we set up a password for the VNC connection.
Now your Ubuntu desktop system is ready to receive the request via VNC protocol. We will connect it remotely in the next step.
Step 2: Control Ubuntu Remotely using VNC
So, when our Ubuntu desktop system is ready to accept the remote connection request. We just have to connect it using a VNC client or VNC viewer application. However, you can use any device either it is a Windows, Linux or Mac machine or even from an Android device.
Using Remote Desktop from another Ubuntu machine
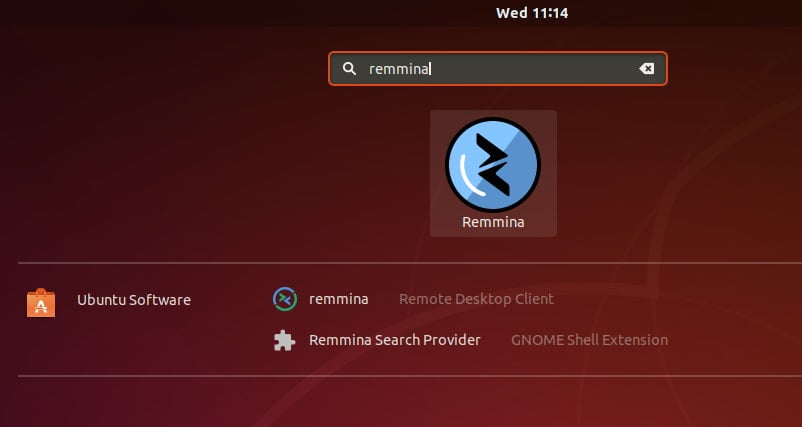
Ubuntu Desktop is already having a tool for VNC connections named Remmina. Remmina is a preinstalled Remote Desktop Client software. It is widely used for making remote connections. Remmina supports multiple protocols like VNC, RDP, SSH, and SFTP for connecting remotely.
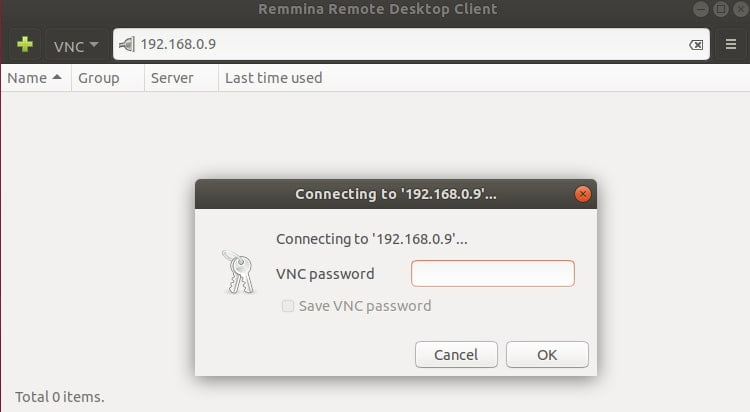
For using Remmina as our VNC client search for the Remmina in the GNOME search bar and open the Remmina remote desktop client.
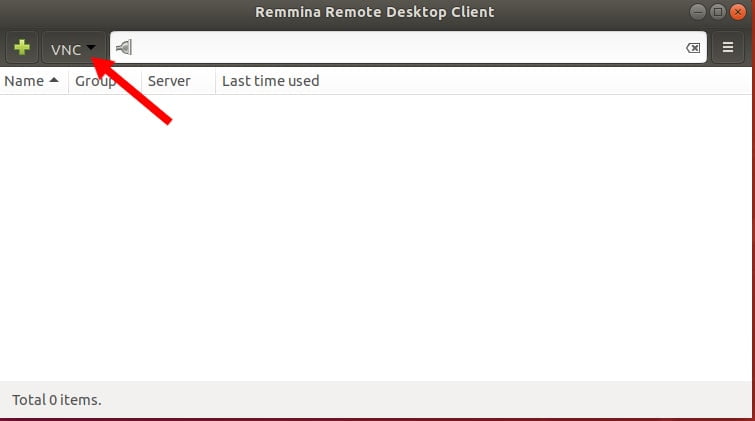
Now select VNC from the top drop-down menu
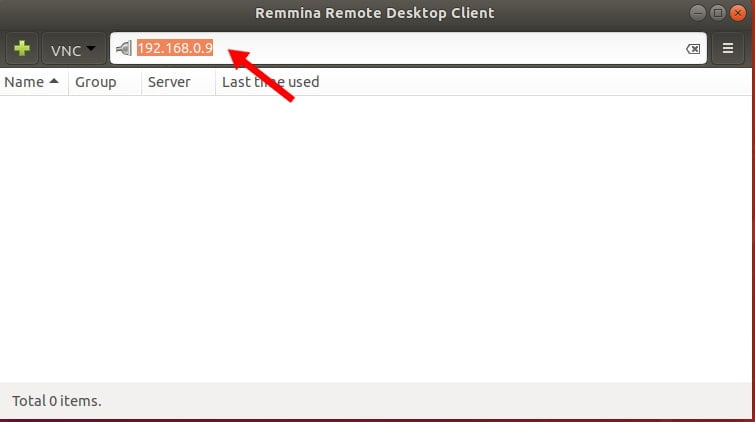
After that, enter the hostname or IP address of the Ubuntu Desktop which you want to connect to.
Yes, that’s it. Now you will be asked for a password if you select password authentication when we setup screen sharing. After that, you will be connected to the Remote Ubuntu Desktop.
- Also Read: Print Awesome ASCII Text in Linux Terminal