Canonical was released Ubuntu 20.04 LTS Server along with its Desktop variant on 23 April 2020. The codename of Ubuntu 20.04 is “Focal Fossa”. In this article, you will find the step by step procedure to install Ubuntu 20.04 LTS Server for a production environment.
Related Article: Ubuntu 20.04 LTS Desktop Installation with Screenshots
The LTS (Long-Term Support) releases of Ubuntu are supported for 5 years from the release date and Non-LTS releases are getting support until 9 months from the release date. This is very important that we use the LTS release for the production environment.
The new Ubuntu 20.04 LTS having some enhancement in features like kernel update and toolchain update. You can get full details of the new features of Ubuntu 20.04 LTS on our previous article: What’s New in Ubuntu 20.04 LTS “Focal Fossa”
Ubuntu 20.04 LTS updates to glibc 2.31, OpenJDK 11, rustc 1.41, GCC 9.3, Python 3.8.2, ruby 2.7.0, php 7.4, perl 5.30, golang 1.13.
Minimum System Requirements
Ubuntu 20.04 Server edition supports 5 major architectures and needs a basic system configuration. Ubuntu is used for various services like web hosting, file sharing, email hosting, etc.
Below is the list of the minimum hardware requirements for Ubuntu 20.04 Server Edition.
| INSTALL TYPE | CPU | RAM | Hard Drive Space |
| Server (Standard) | 1 GHz | 512 MB | 1.5 GB |
| live server | 1 GHz (amd64 only) | 1 GB | 1.5 GB |
| Server (Minimal) | 300 MHz | 384 MB | 1.5 GB |
The above are the minimum requirements for installing the Ubuntu 20.04 Server Edition. You may require a different system configuration depending on your needs.
Steps to Install Ubuntu 20.04 LTS Server “Focal Fossa”
Step 1) Download the ISO image and Create Bootable Disk
At the very first stage, we have to download the ISO image of Ubuntu 20.04 from its official website. You can use the below link for going to the download page.
Or directly download it by clicking on the below button.
After downloading the ISO file, burn the ISO into a USB or DVD to create a bootable disk.
Learn Here: How to Create a Bootable USB disk for Ubuntu
Step 2) Boot from the bootable DISK (USB or DVD)
After creating the bootable disk, reboot the target system and select our bootable disk as the primary boot device.
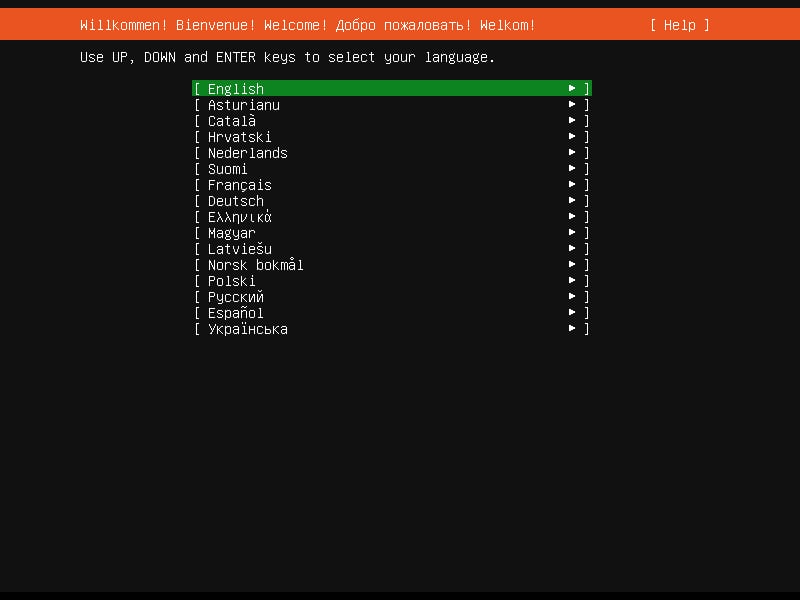
You will the below screen if the system boots from our bootable disk. Also, select the language on this page by pressing the Enter key.
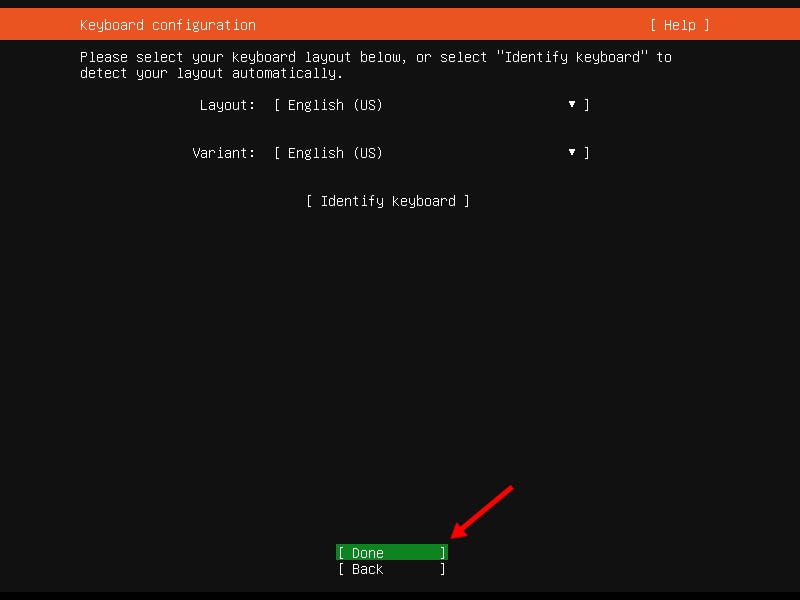
Step 3) Choose Keyboard layout
After choosing the language, you will be asked to choose the keyboard layout. Select the preferred keyboard layout and press the Enter key to continue.
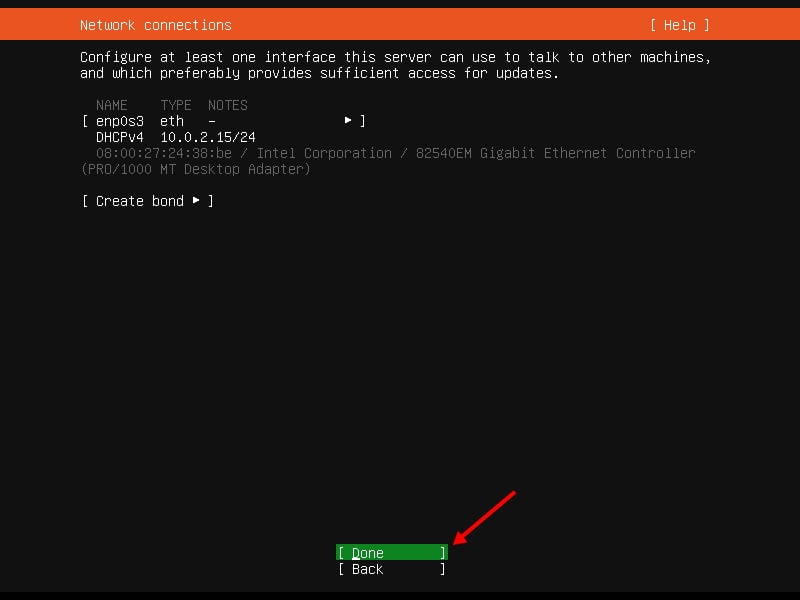
Step 4) Configure Network
On the next screen, we have to configure the network. If the system is connected to a network then it will automatically receive an IP address. Select Done and press the Enter key to continue.
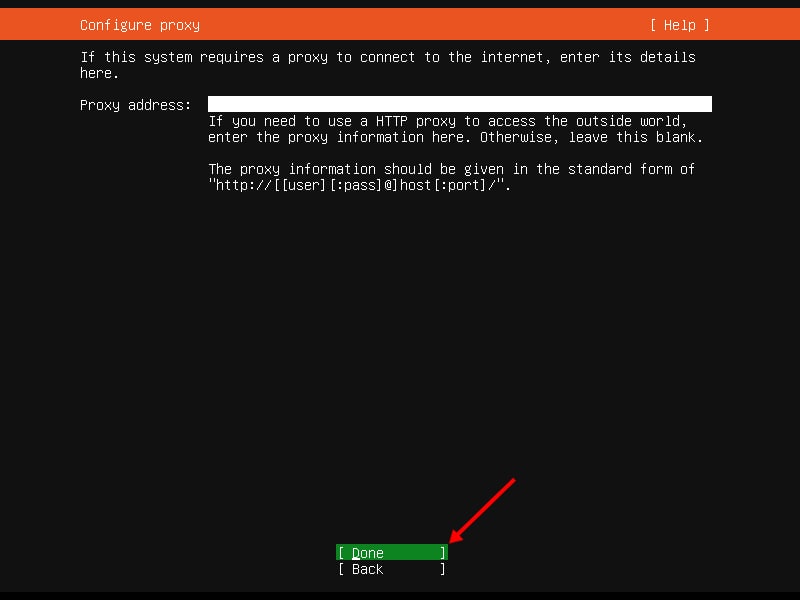
Now if your network setup required to connect to a proxy server, enter the address of it. Otherwise, leave it blank and select Done and press Enter to continue.
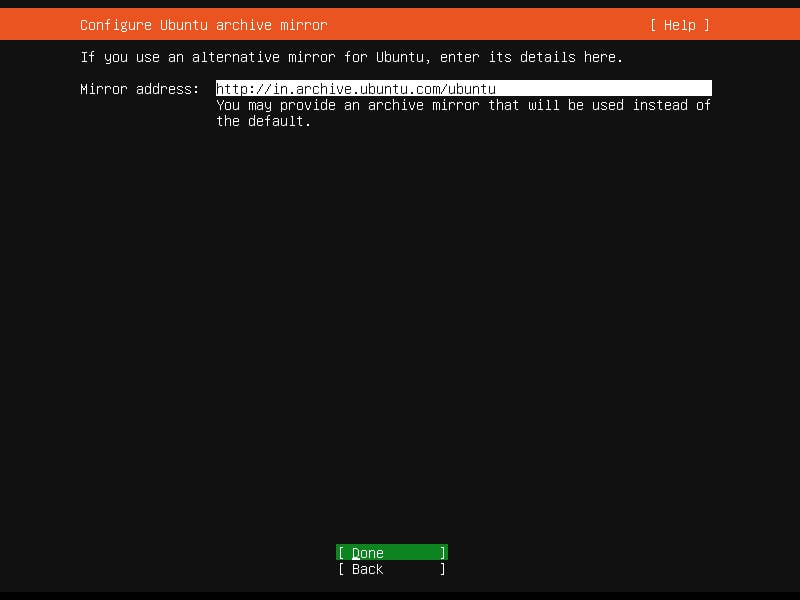
After that, we have to configure the Ubuntu archive mirror for downloading updates. Here installer will automatically select the best mirror for you based on the country. You can also enter a different mirror but that is not recommended. After choosing one, select Done and press the Enter key to continue.
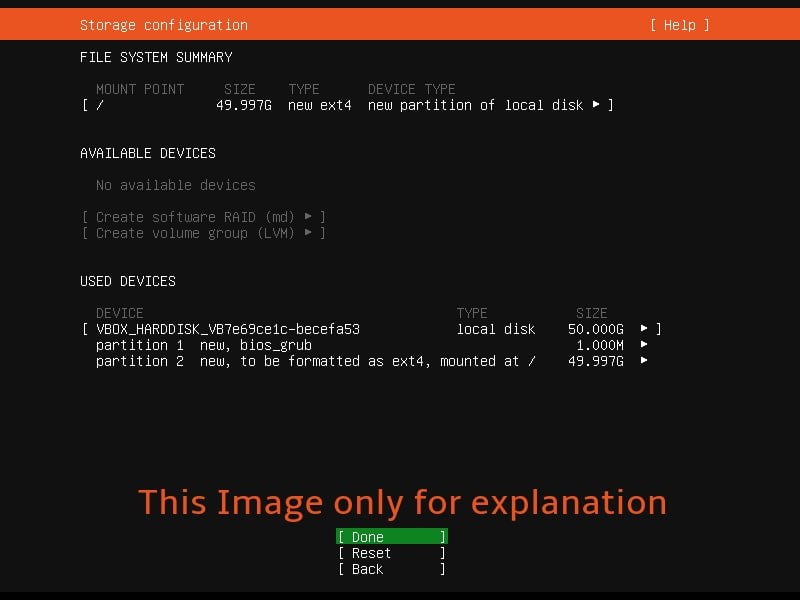
Step 5) Configure storage (Manual Partition)
In this step, we have to configure the storage configuration and mount points. As you can see in the below image we have two options for storage configuration. The first one is the Use an entire disk option which is also the default selected option and second is the Custom Storage Layout.
If you select the first option Use an entire disk then the installer will remove all existing partitions and erase all the data. In this method, only two new partitions will be created by the installer first is the /boot partition of 1GB and the other one is “/” slash or root partition of all the remaining space.
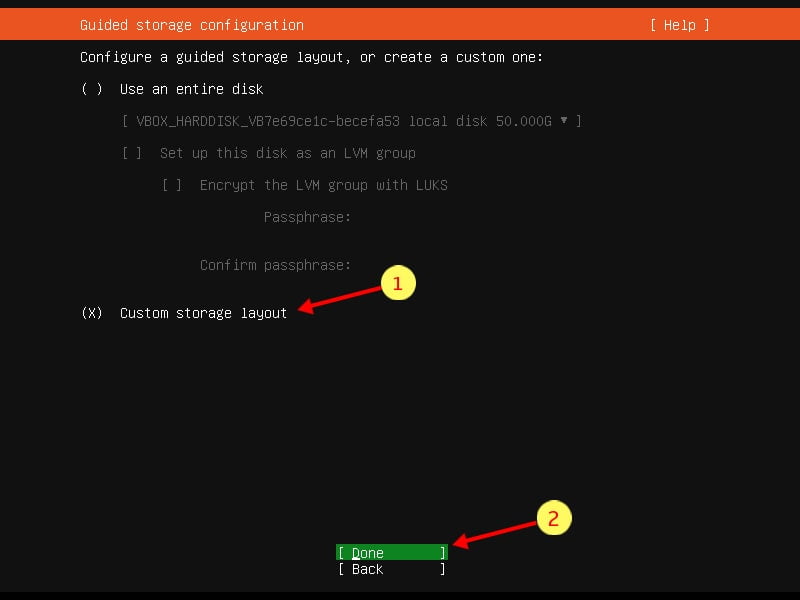
Where many blogs and articles suggest the LVM (Logical Volume Manager) partition method, I personally like and prefer the second option which provides the option for creating partition manually.
Also for this tutorial, we will create the partition manually. We are having 50 GB Hard Drive for this installation tutorial and below is the list of the size distribution for different partitions.
- /boot = 1 GB (ext4 file system)
- / = 15 GB (ext4 file system)
- /home = 18 G (ext4 file system)
- /var = 12 GB (ext4 file system)
- swap = 4 GB (Swap file system)
To do this, select the second option “Custom Storage Layout” and press Enter for the next step.
Creating /boot partition
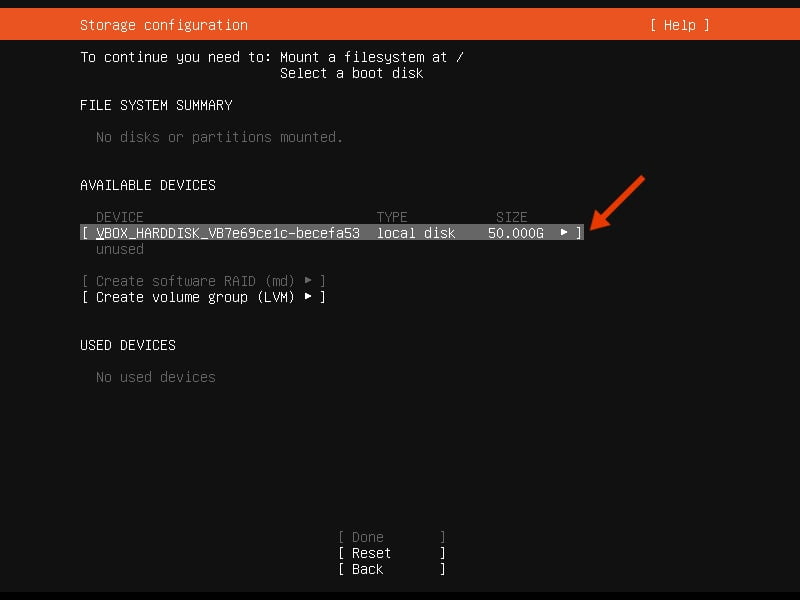
On the next screen, you can see the list of the connected storage devices. From this list, select the target device in which you want to install the Ubuntu Server. Press the Enter key after selecting the device.
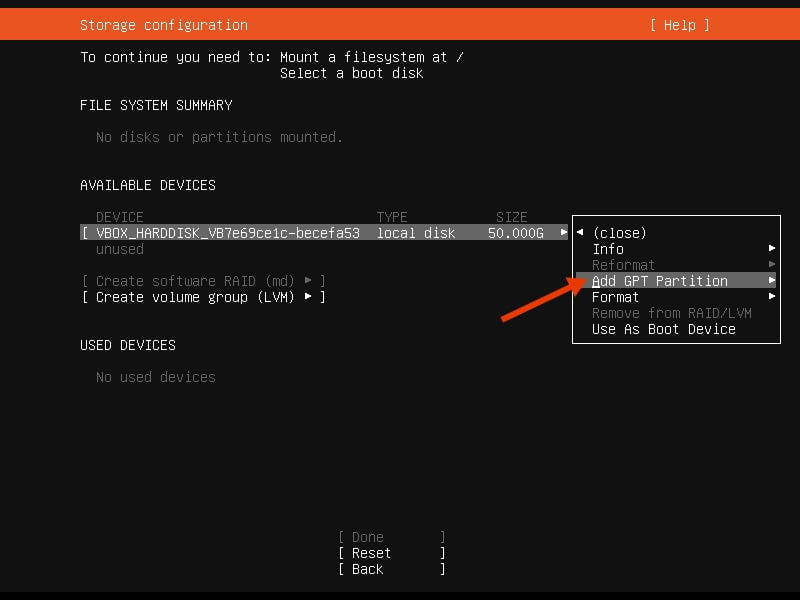
You will see the below options when you press the Enter key. Select the “Add GPT Partition” option from this menu and press the Enter Key.
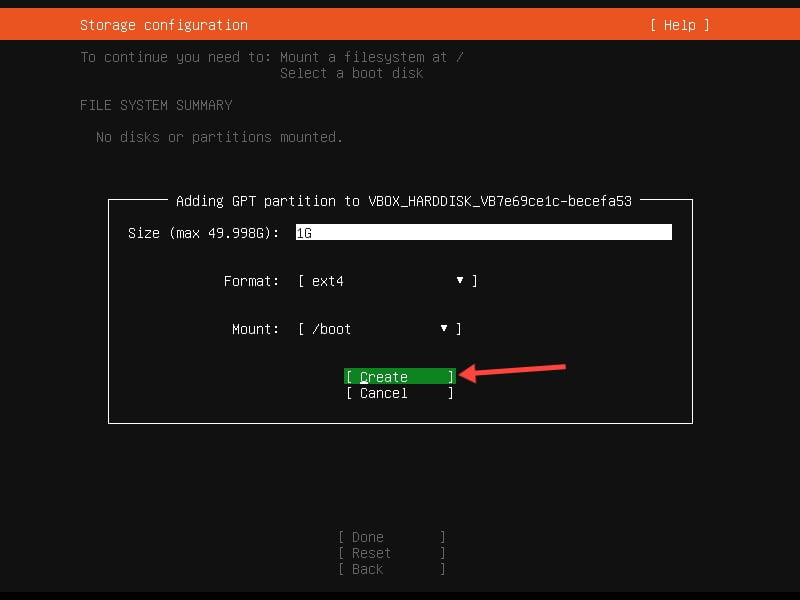
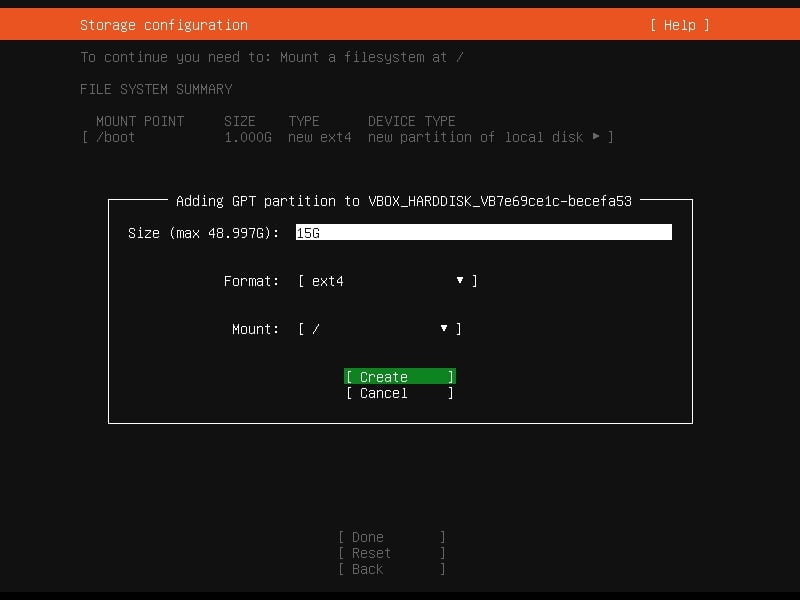
Now we will be asked for a partition size, format, and mount point. So we are creating the /boot partition of 1GB size in this step as shown in the below image. After filling all the required details select the create option and press the Enter Key.
Creating “/” or root partition
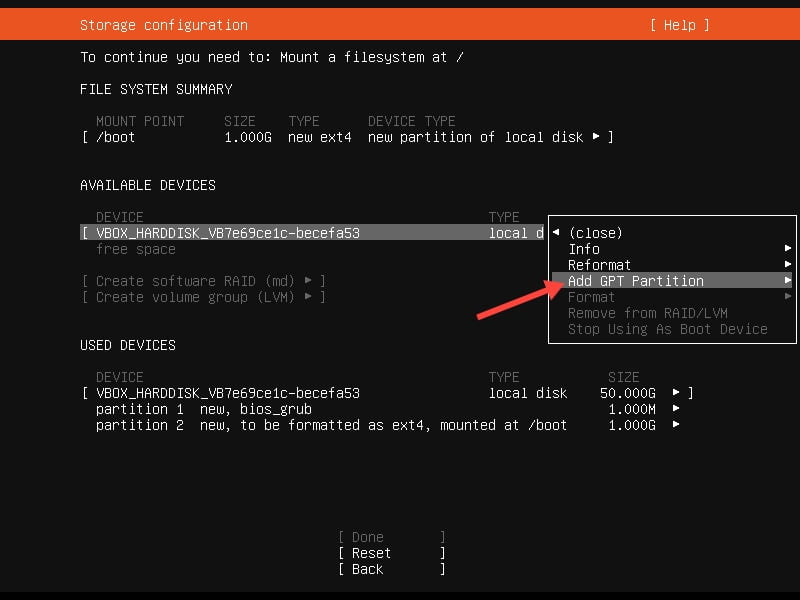
After that, for creating our next partition repeat the last step. Select the device from the list and select the “Add GPT Partition” option.
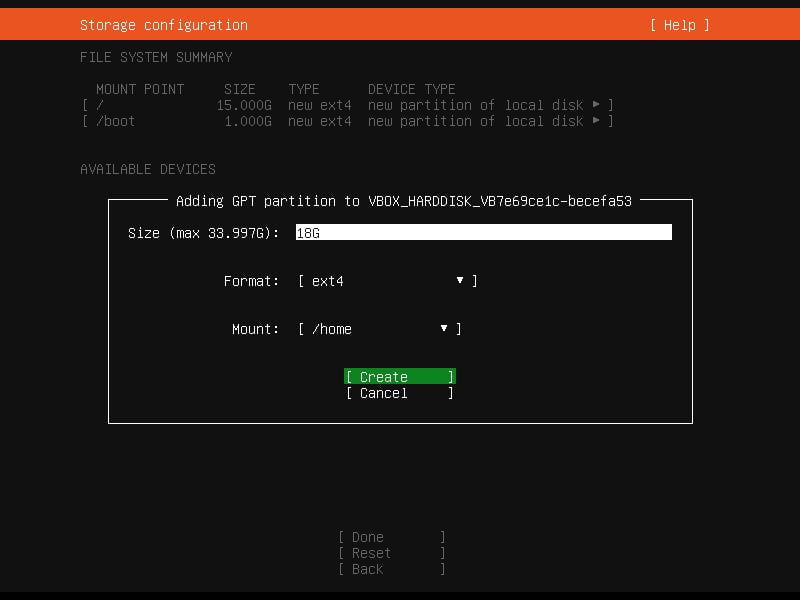
Now enter the details for the “/” slash or /root partition. Here we are creating a partition of 15GB size and select mount point as “/” from the drop-down menu.
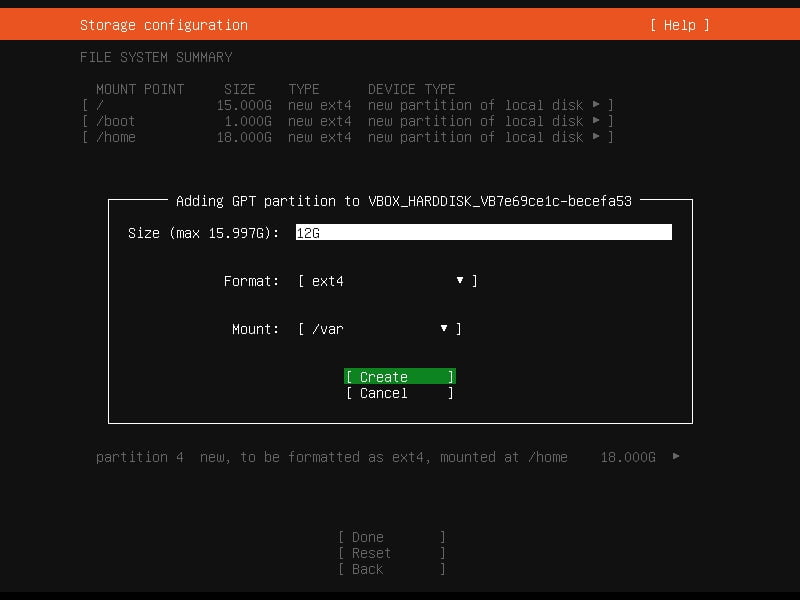
Creating /home and /var partitions
Now we will create our “/home” and “/var” partition of sizes 18 and 12 GB respectively.
Creating swap partition
In the end, we will create the swap partition of the remaining size. For this, we will add a GPT partition and select the format as “swap” from the drop-down list. Mount point option will not appear after selecting the format as swap.
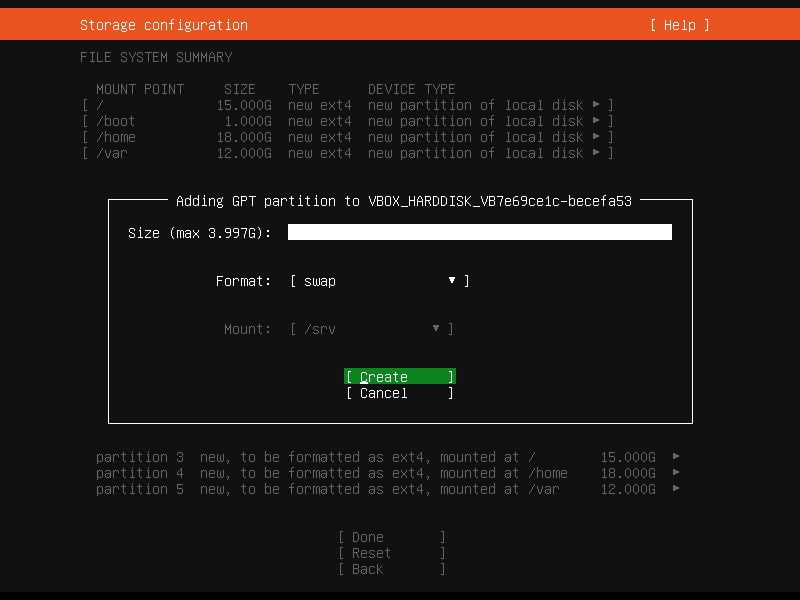
After creating all the partitions select the done option and press the Enter key to continue.
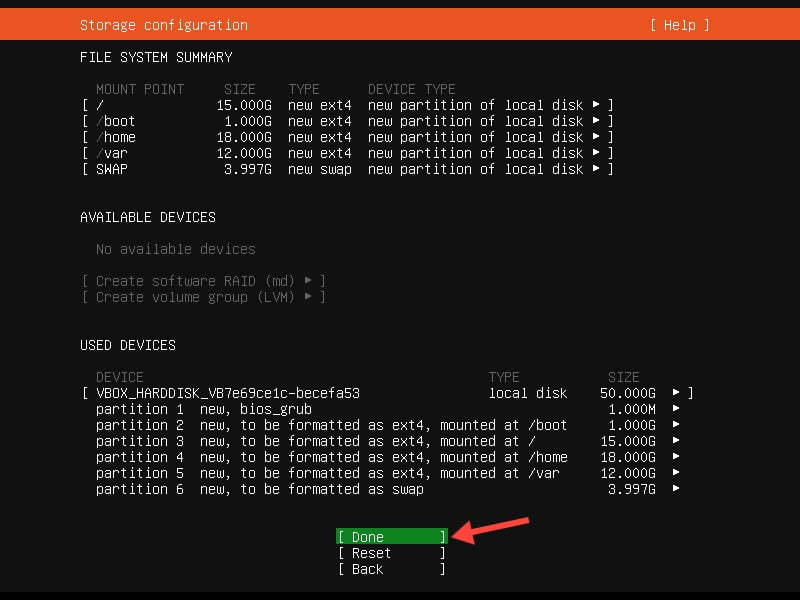
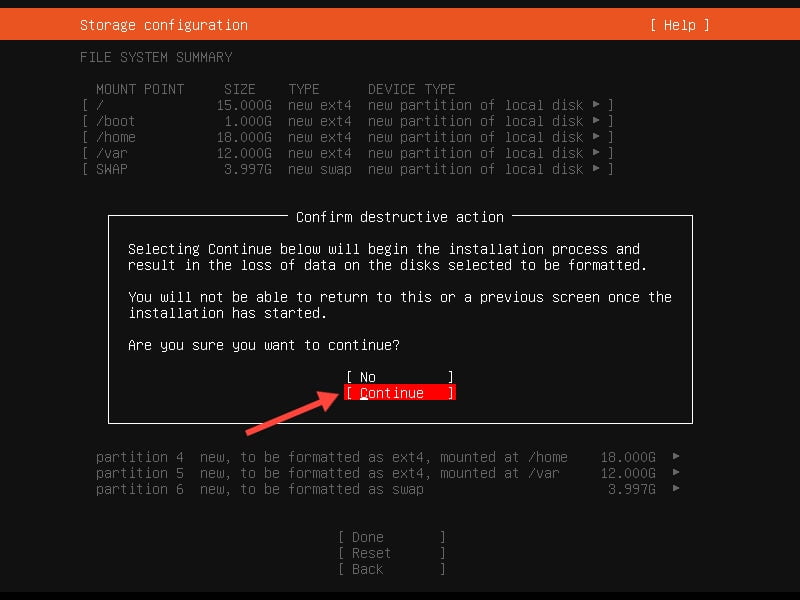
For writing changes to the disk confirm the action by selecting the continue option and press the Enter key.
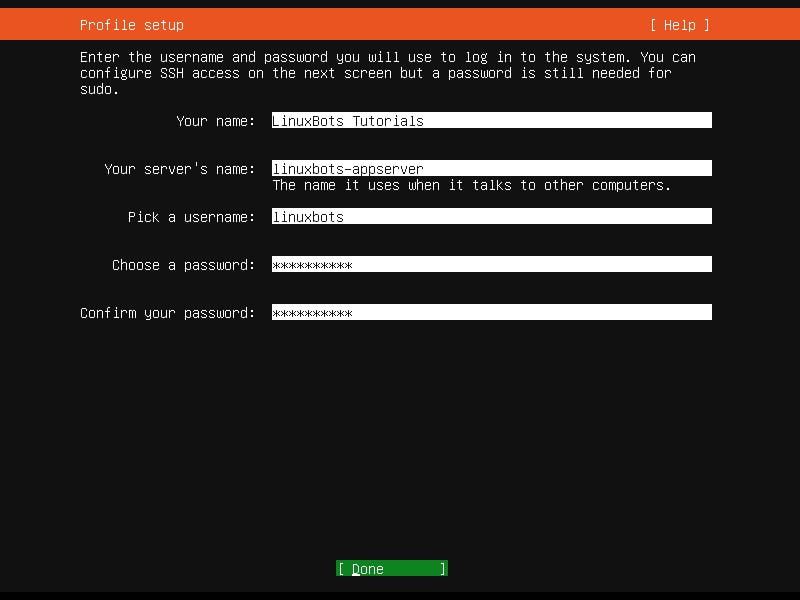
Step 6) Configure System Profile and Hostname
In this step, we will be asked to provide the details for username, password, and hostname for the system. After filling all the details select the “done” option and press the Enter key.
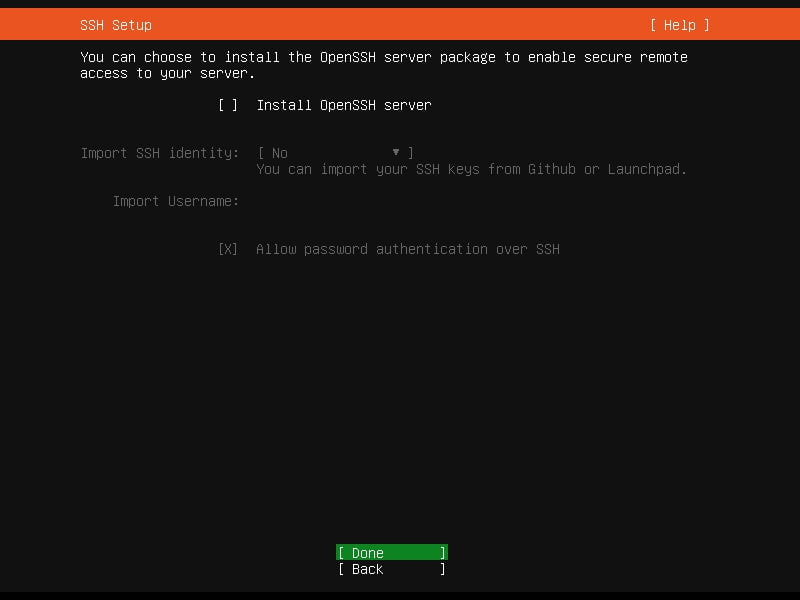
Step 7) SSH Setup
In the next step, you will be asked to install the OpenSSH server. If you want to enable the SSH service after installation then you have to select the option “Install OpenSSH server” but for this tutorial, we will not install the OpenSSH server. Select done and press Enter key to continue.
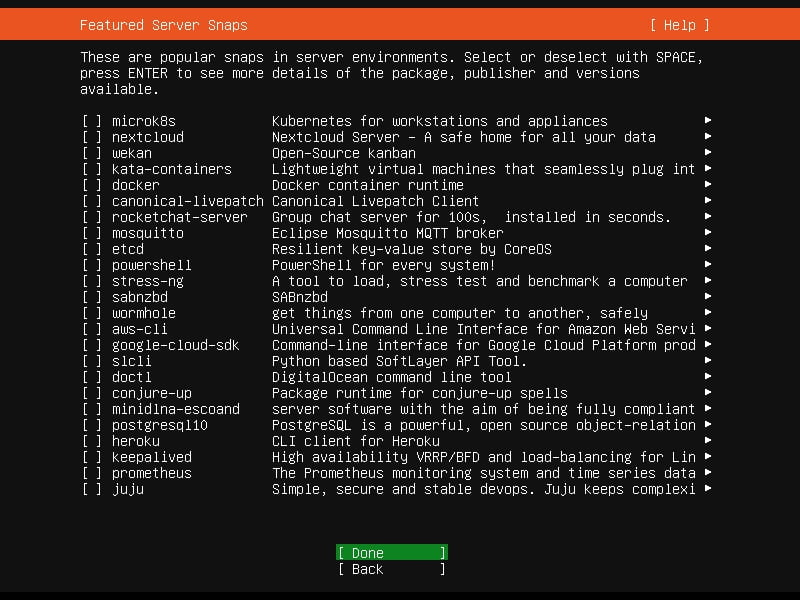
Step 8) Featured Server Snaps
In this step, the installer will provide the list of server snaps which you can use directly during installation.
For example, if you want to set up a file-sharing server after installing Ubuntu 20.04 LTS then you can select the Nextcloud Snap from the list. But for this tutorial, we are not using any of these snaps. Select Done and press Enter key to continue.
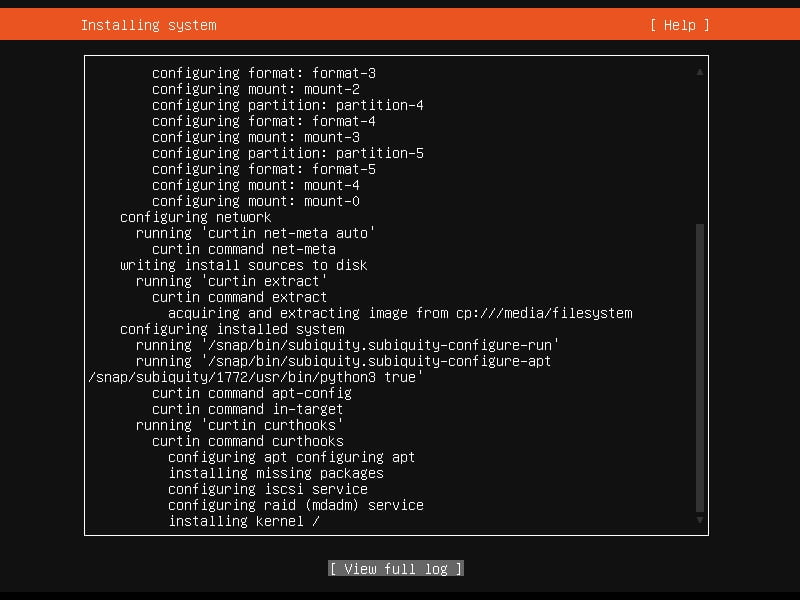
After this, the final installation will starts. It will take several minutes to continue.
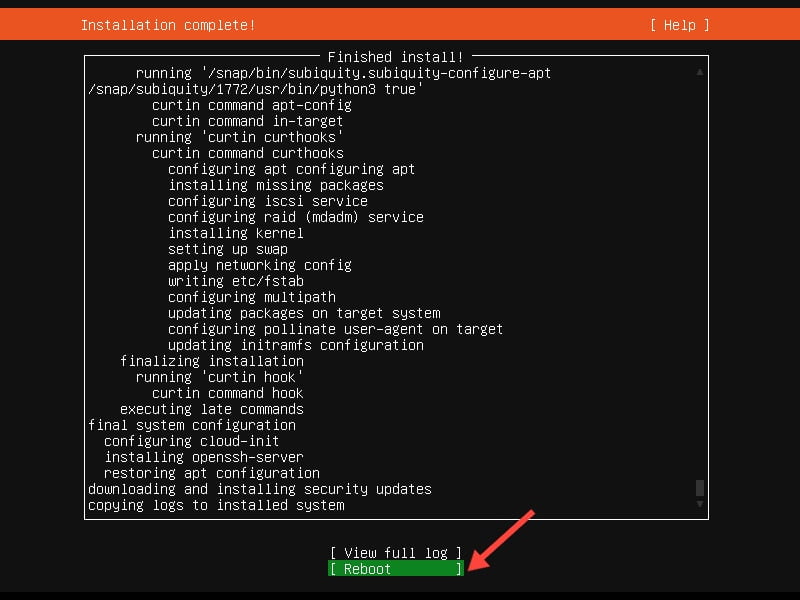
Step 9) Finish the installation
After some time you will be asked to “reboot” the server to finish the installation. Select the reboot option and press the Enter key.
Step 10) Login into the Server
After rebooting the server, you will we the login screen. Use the password we created during installation to login.
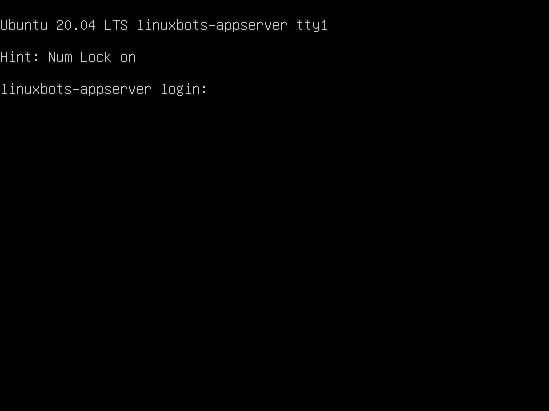
Here we successfully installed and logged in into the Ubuntu 20.04 Server.

This concludes the article, and now we have our Ubuntu 20.04 LTS Server installed successfully.
For 20.04.1, the installer does not offer the “Featured Server Snaps” in step 8 and appears to skip it. Any way to (re)-enable this feature during or post-installation?
Good on the partition instructions. I imagine others will thank you for it also.
Thanks.